Hotspot slides are commonly used when creating e-learning courses. If you prefer to divide long content into smaller sections, hotspots will come in handy. Or if you like to highlight some important information, you can place a hotspot exactly where you want. And if you want to make your course a little bit more interactive, well go ahead and place a hotspot slide in your course.
Most of our template packages contain at least one hotspot slide, but in almost all of them, user can freely navigate through them without reading every single popup hidden behind a hotspot.
What should you do to prevent user from navigating through a hotspot slide without even clicking on any hotspots?
Well, here we can help. In this tutorial, we will take a look on how to create a hotspot slide with disabled forward navigation, so that users would have to click on all hotspots and learn all the information you have thoughtfully provided.
Step 1 – Two types of Hotspots in Captivate
If you work with Captivate, you have probably noticed the Click boxes that work like hotspots. And if you are a daily user of Captivate, you have probably noticed how limited are the options for these click boxes. That’s why we always choose to create custom build hotspots with images using whether smart shapes or transparent buttons.
Step 2 – Objects used in Hotspot slide
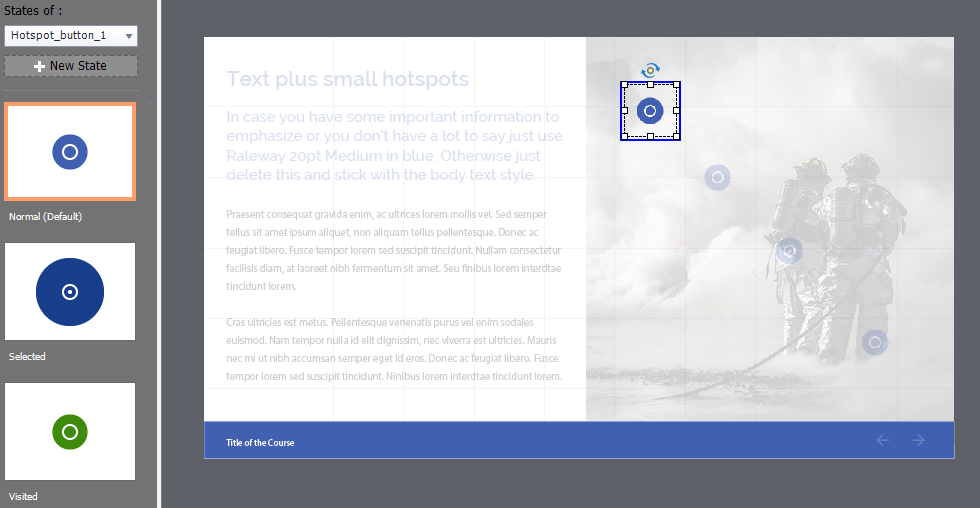
There are two important objects used in every hotspot slide – hotspot and popup for each hotspot. Usually, every hotspot consists of three states – normal, selected and visited. Normal state is active when entering the slide; selected state becomes visible when user clicks on the hotspot, and visited state appears when user closes the popup or clicks on other hotspot.
Step 3 – Actions and variables
In hotspot slide we will need to create 3 actions that we will later use –
- Setup action on entering the slide, that will reset the slide and disable next button;
- Action that each hotspot will execute;
- Action for every close button in popups.
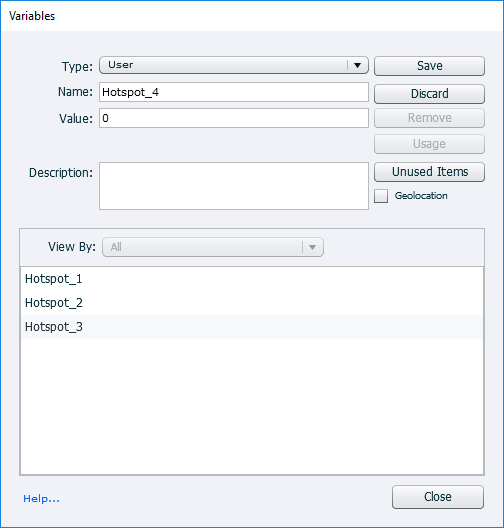
As we are making hotspots with 3 different states, we will also need variables to tell which hotspot is already clicked on. That’s why we need to create variable for every hotspot we will build.
Step 4 – Hotspots
Each hotspot will have 3 states as mentioned before – normal, selected and visited. Each state has been created manually, but you can also add “Roll Over” and “Down” states to your hotspot.
Before we make any advanced action we need to create all objects we want to put in this particular slide. This means we need to duplicate the existing hotspot and create popup for each new hotspot we make. We should also add navigation buttons, so it would be possible to disable next button on this slide.
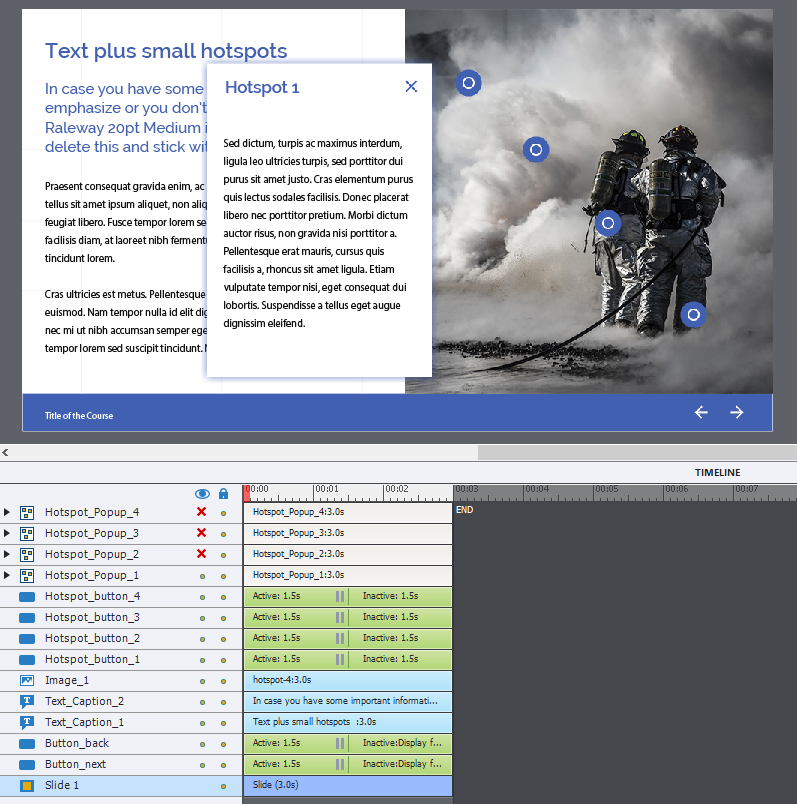
In the above image you can see, that we added new objects to this slide and now we have 4 hotspots, 4 popups and navigation buttons on the lower right corner. We created an additional “Disabled” state to the next button.
Now that we have created all elements in this slide, we can start to create advanced actions that we will later turn into shared actions. To find out the difference between an advanced action and shared action, you can read our Captivate Guides.
Step 5 – Advanced Hotspot action
At the beginning we create an action that first hotspot will execute every time user clicks on it. Below you can see that once you click on this hotspot, it will – change state to hotspot button from normal to selected, then show one popup and hide all other popups on this slide, and also increment the variable “Hotspot_1“. You may also wonder – what about the weird expression “99 is equal to 99” at the top of the action? Well we do this, just in case you want to change something and add some condition to this action. Then you can simply remove this expression and add something else.
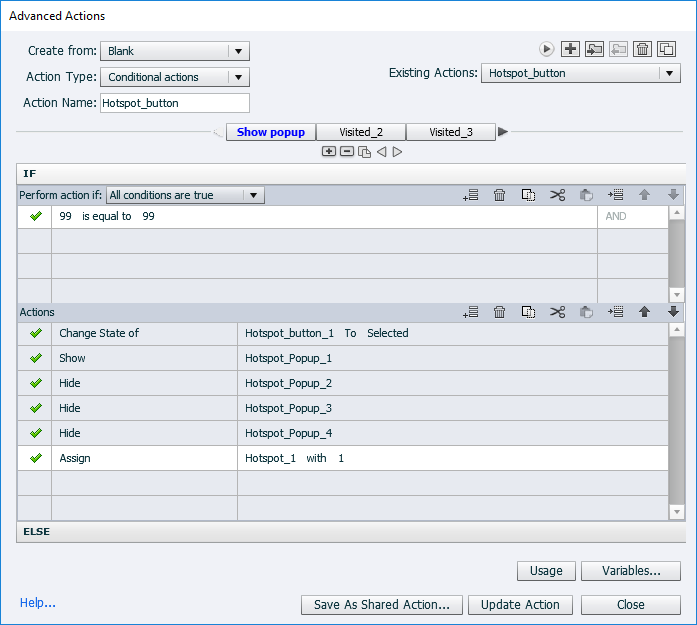
But if you look close to this action, you can see that there are two more tabs in this action. Actually – 4 more tabs. Below you can see the second tab.
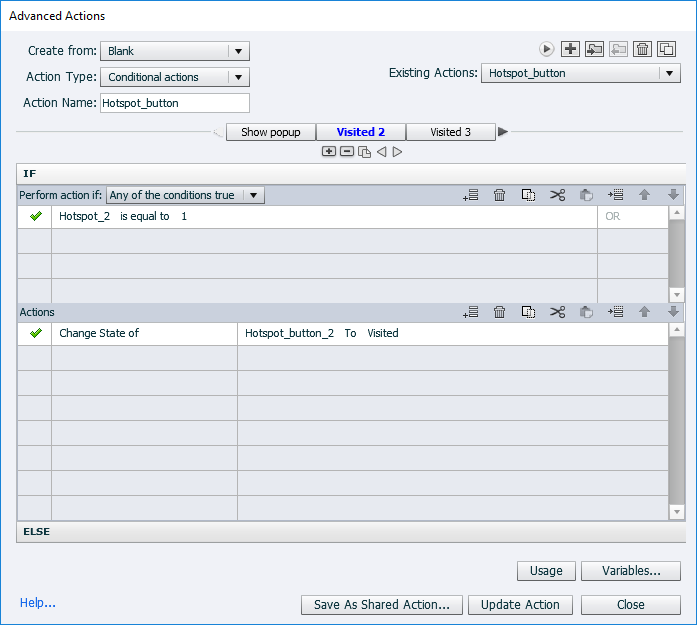
The next two tabs are almost the same as this one, except the variable and button is adjusted to different hotspot. For instance if variable Hotspot_3 is equal to 1 it will change the state to third hotspot button to visited. And if the fourth hotspot variable is equal to 1, the same will happen to the fourth hotspot button. All variables are 0 at the beginning and all of them will change once you click on the hotspot. That’s how we can know if the hotspot were opened or not – simply by checking if the variable has changed from 0 to 1. So from all this we can understand, that every time we click on hotspot it will do multiple things – not only show popup and change state to the particular hotspot, but also check if the other hotspots have been visited. And if so, it will change its state to visited.
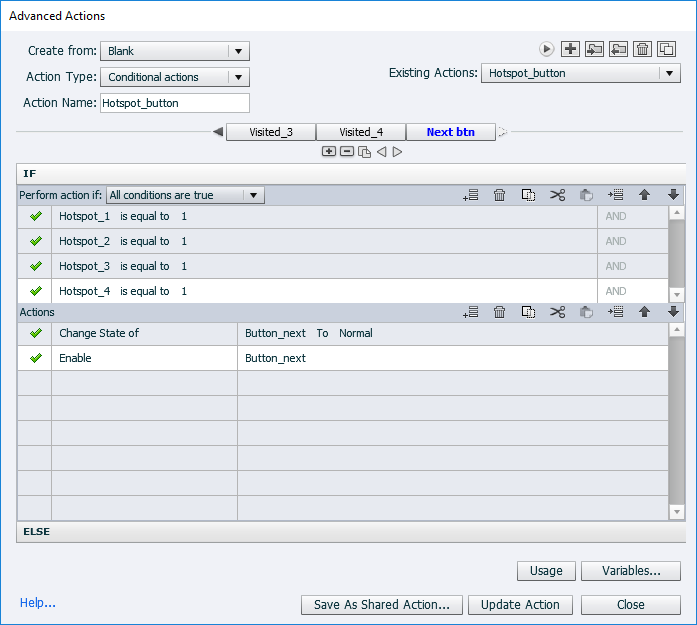
The last tab is created for the next button – it will check if all hotspot variables are equal to 1, and if so, it will enable the next button. You can see that there are two actions – change state and enable next button. Keep in mind that we will also have to create the action that will do the opposite! Because we need to disable the next button on entering the slide, but we will get to that.
Step 6 – Shared Hotspot action
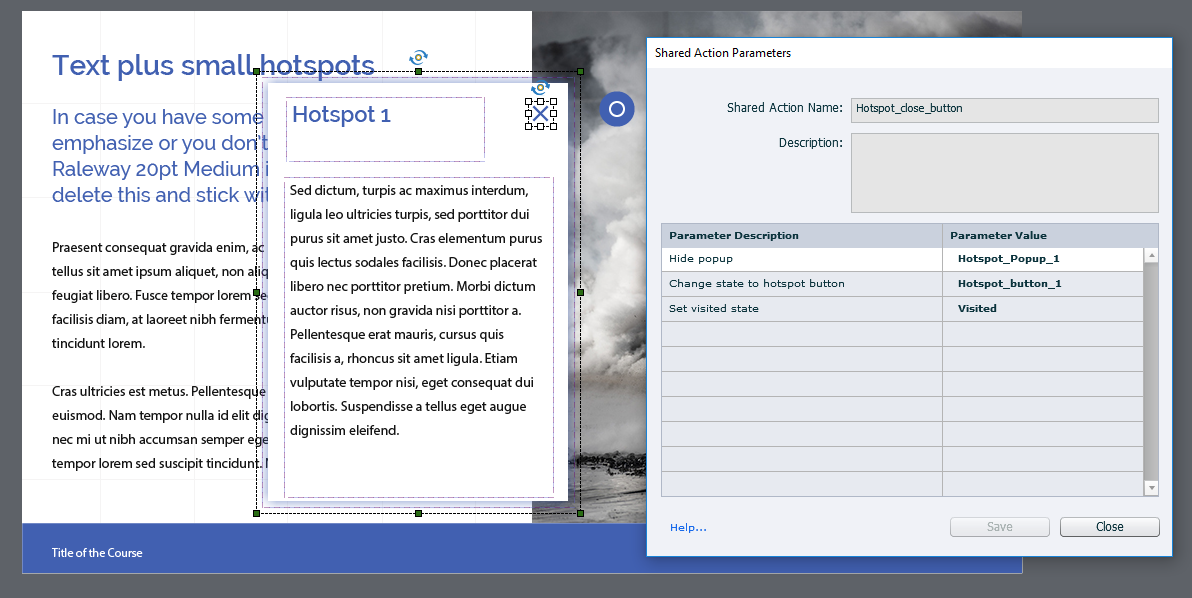
Next step is to save this advanced action as shared action, so we can use it to all other hotspots we created earlier. You have to write parameter description to every action you created. You can write whatever you want in the parameter description field as long as you understand what to do with it once you have to use it.
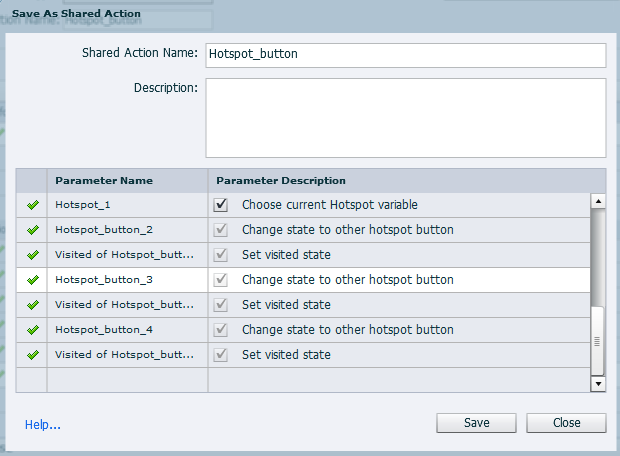
Here you can see an example of our shared action. Unfortunately, you cannot change the order of the parameters, but if you have created the action on your own it will be easier to understand. Remember to indicate the current hotspot you are working with, because this hotspot has different actions than every other. We usually try to write something like “Change state to current hotspot…” or “Choose current hotspot variable…” so it would be clear that we are talking about the hotspot you are currently working with.
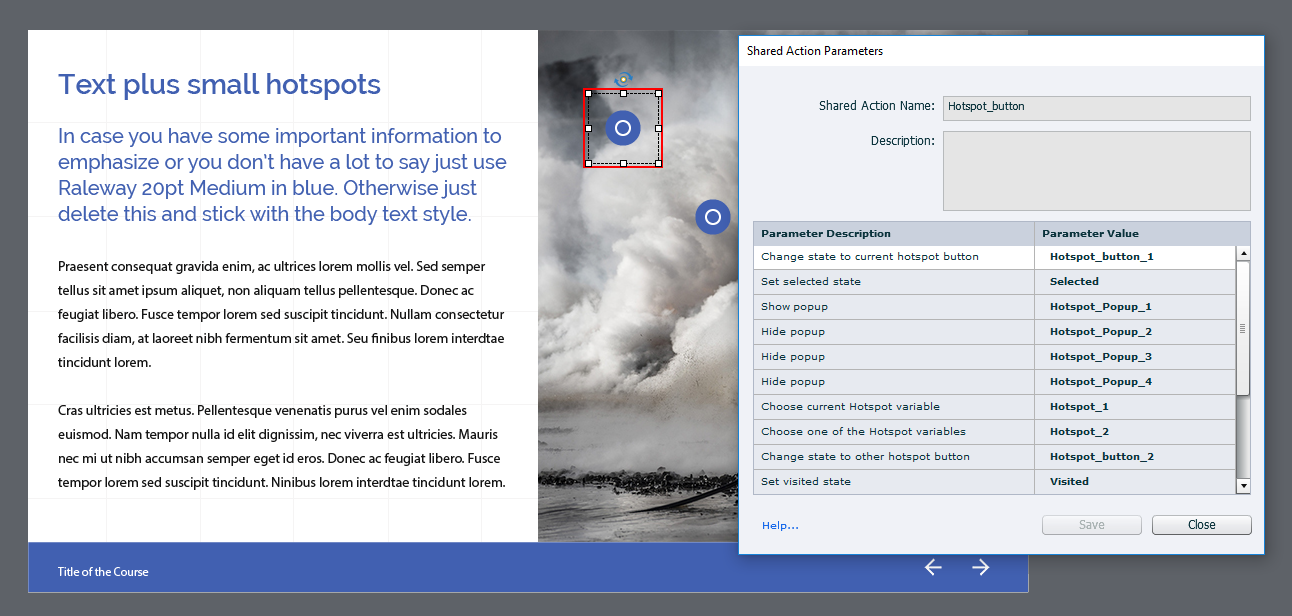
This is an example with the first hotspot, but now you have to do it with others too. Be careful and choose the correct objects and variables for each of them.
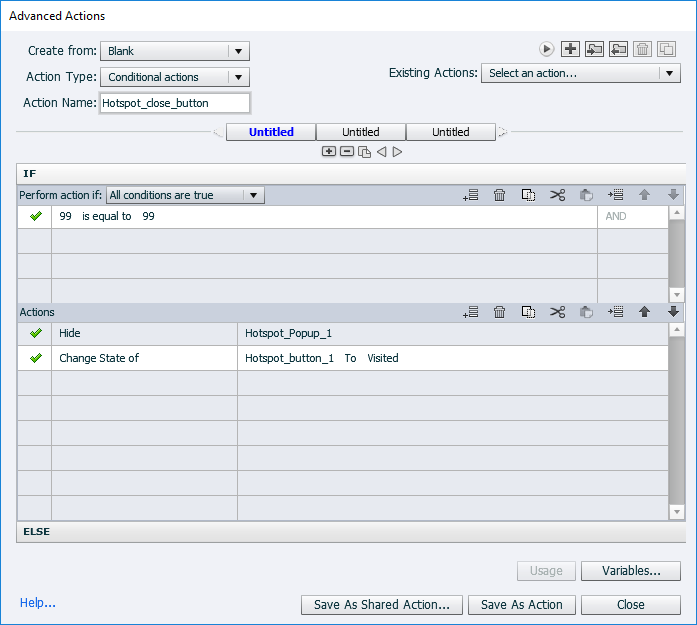
Step 7 – Hotspot popup close button action
For each popup we created a close button that will do 2 things – close the popup and change state to hotspot. That’s why we need to create another advanced action.
And with this action we will do the same as with previous one – save as shared action and add to every close button.
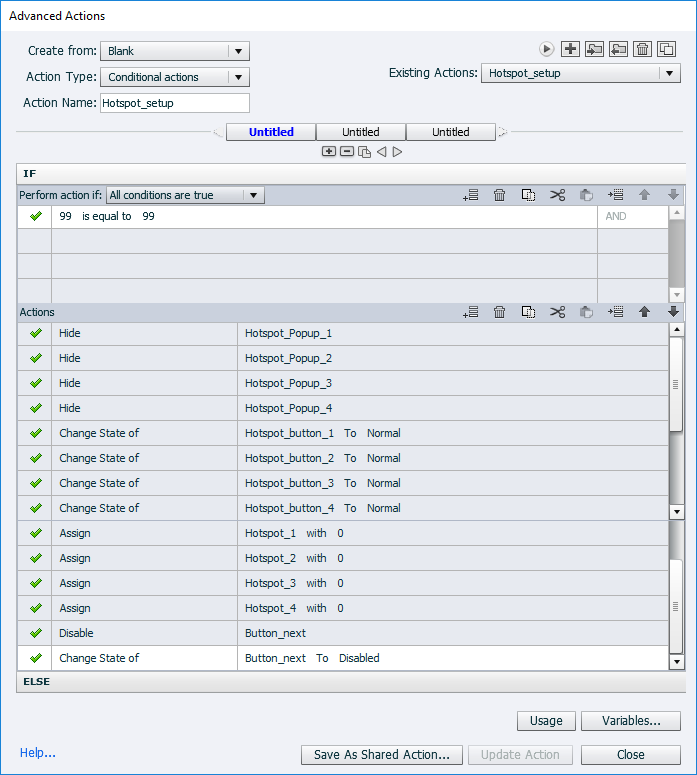
Step 8 – Setup action
Third action we will create is for setting up the page and we will add this action on entering the slide. We usually try to reset every element on the page, but you can do as you wish. We will now create action that will hide all popups, change states to all hotspots to normal, resets all used variables and disable next button. But if you prefer to leave the page as it was when user was visiting it, please do so. We usually want to include all options our customers would have wanted and it is always easier to remove actions than to create new ones.
So this action could look like the one below. If you plan to use more than one hotspot page in your course, you should create shared action for this on too. If you are certain that this is the only hotspot page you will use, you can leave the advanced action.
Step 9 – Done!
If you have come this far, then we can say for sure – you are now capable to create a hotspot slide with disabled navigation on your own! Good luck!
Explore all Captivate templates
You can find a hotspot slide in almost all of our Captivate template sets. Explore hundreds of course starters, games, click & reveal, info pages and test templates. Click the button below and see all of our Adobe Captivate templates!

Comments