And yet, another Articulate E-learning heroes weekly challenge grabbed our interest by hand. This week it’s all about the glassmorphism in Storyline.
Glassmorphism – who’s that?
Glassmorphism is a design trend that has been around a while (even since Windows Vista times!), but it has gained recent popularity. It is a blurred effect that gives an impression of frosted or blurred glass over an object behind said glass.
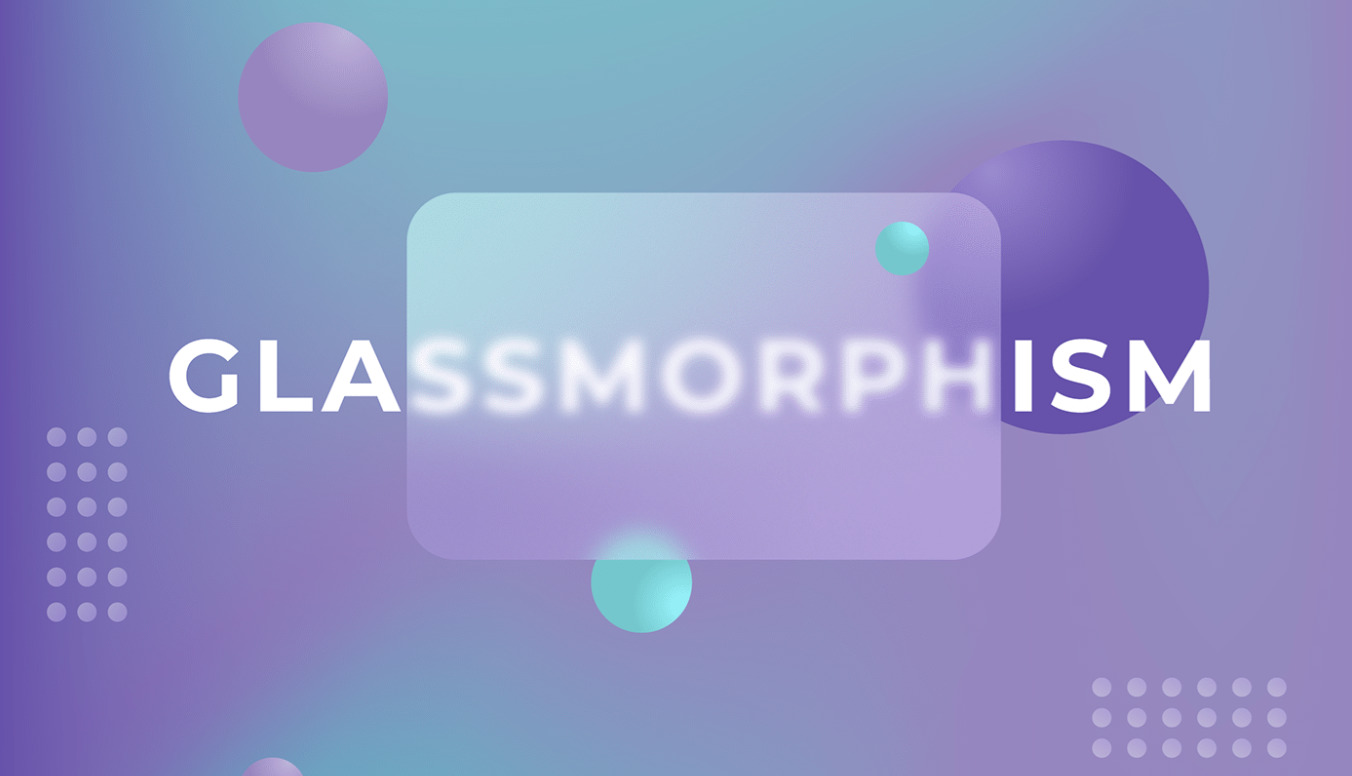
Artwork by Ekaterina Kaurkina on Behance
Glassmorphism and Storyline
Sadly, at this moment Articulate Storyline built-in options do not give enough reach for creative vibes to create high-quality glassmorphism effect.
Storyline can make objects transparent or semi-transparent, but it lacks the blurring options. Therefore, graphic files need to be prepared elsewhere. There are various ways to get the desired result, for example, Adobe Illustrator or Photoshop, as well as various online tools.
How to create glassmorphism
As mentioned before, there are various ways how to create stunning glassmorphism examples. If you are interested in tweaking our template or making your own, we have created a guide about it. The step-by-step instructions are for awesome free online design tool – Figma.
Click here to see the blog post about it.
Our example
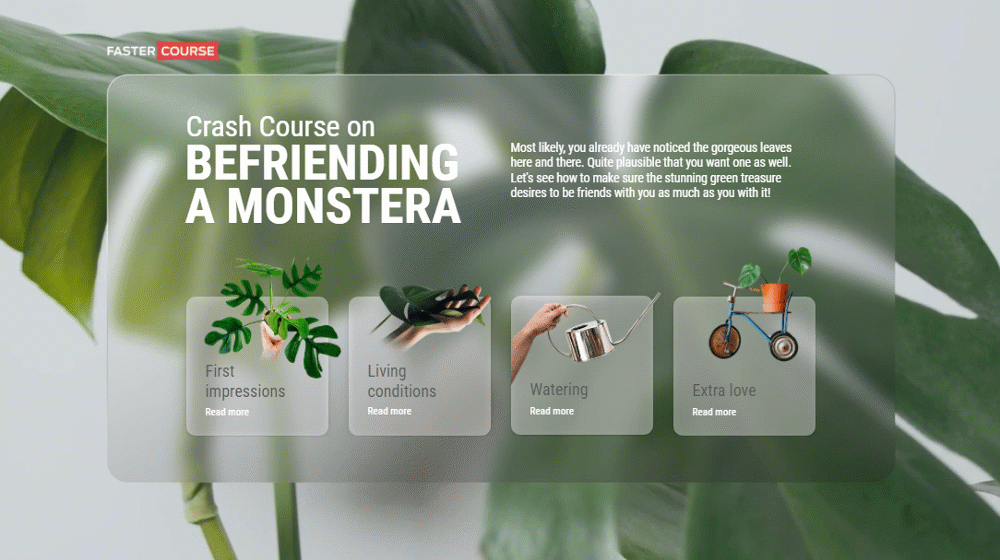
As told previously, the glassmorphism background effect wasn’t created in Storyline. Our design teams tools of choice were Adobe After Effects, Illustrator and a pinch of Photoshop to make everything look like we wanted. But, as said earlier, you can use also other tools to achieve same result, including Figma. We imported the final graphics in Storyline and together with some built-in objects achieved the result you can see underneath.
So let’s discuss it more in detail, shall we?
We wanted to show a different approach to the effect than previous submissions, therefore we chose video in the background and the ‘glass panel’ in front of the video. For that, we used After Effects. The glass panel also works as a background for the text and interactive buttons. Buttons lead to the respective page where user can read more about each subsection.
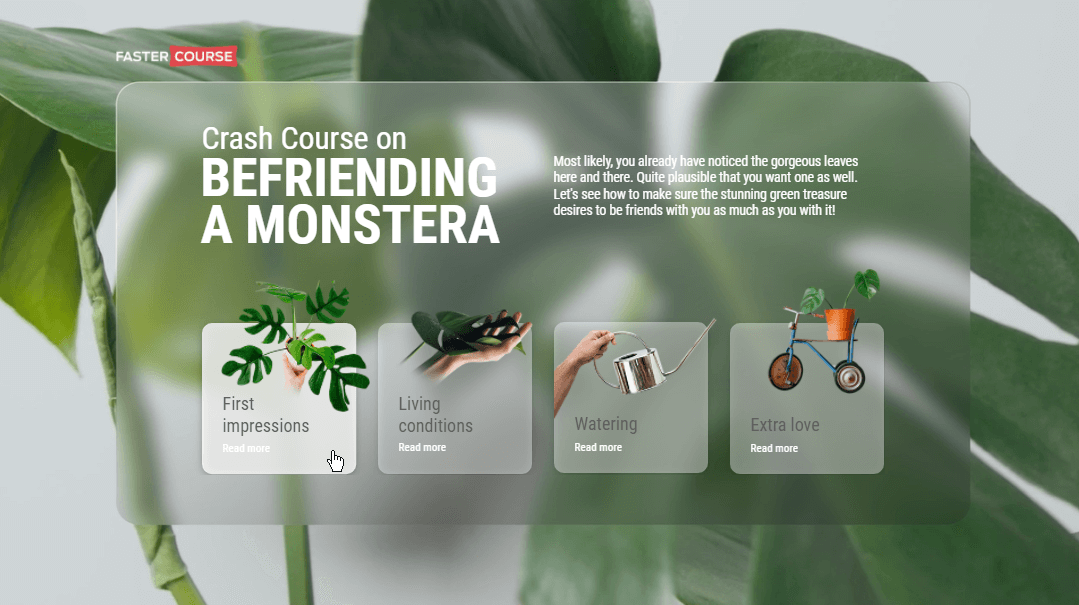
Subsection pages have still glassmorphism effect and a couple of additional buttons – to navigate between subsections and to return to the menu screen. This glassmorphism effect was achieved by using Adobe Illustrator and Photoshop but you can do it also in other tools, like free-access online design tool Figma. How so? Import the desired background image, add an object that will have the glassmorphism effect, on top of the background image. Add background blur to the object above the image and you are mostly done! Just tweak the blur and round the corners, add drop shadow or frame if wanted.
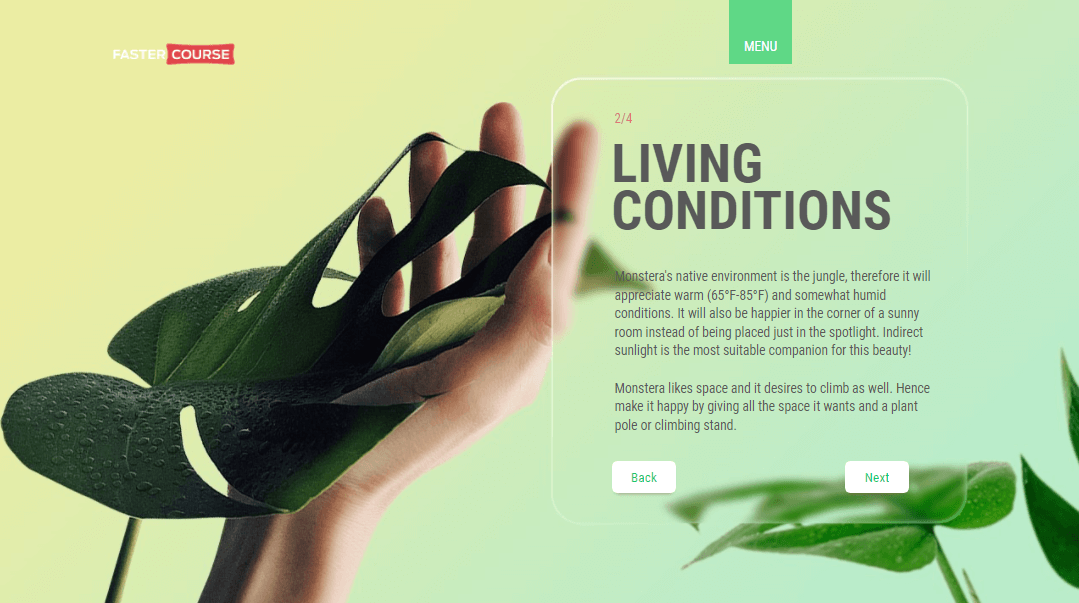
Rather simple and minimal Storyline build-up but what a visual! We definitely enjoy looking at those spectacular Monstera’s leaves slowly swaying so gracefully. Hope you do too!
Download for free
Want to learn more about how we built this example? Feel free to download the source file, explore it and use it for non-commercial purposes. If you would like to use this Storyline template for commercial use, please consider subscribing to the FasterCourse Storyline template library.
Comments