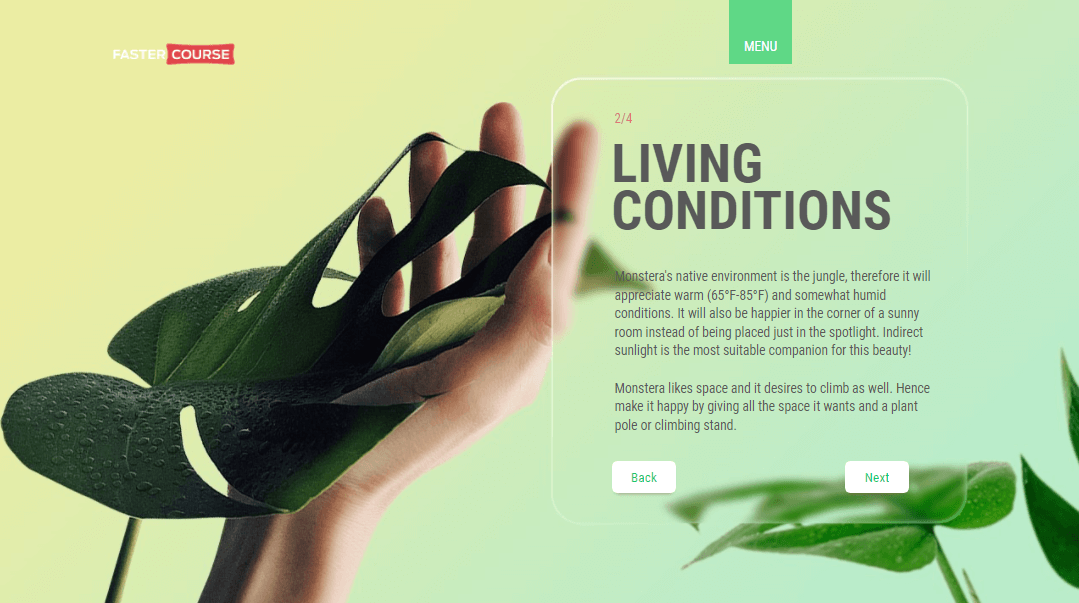
Are you interested in creating a similar glassmorphism effect like in the image below? If you aren’t sure how to make it happen, don’t worry, we have you covered!
To create this, we used Figma – it’s browser-based and a powerful design tool. And it’s for free! Therefore, we thought you would like to see in detail how our design team created the stunning backgrounds.
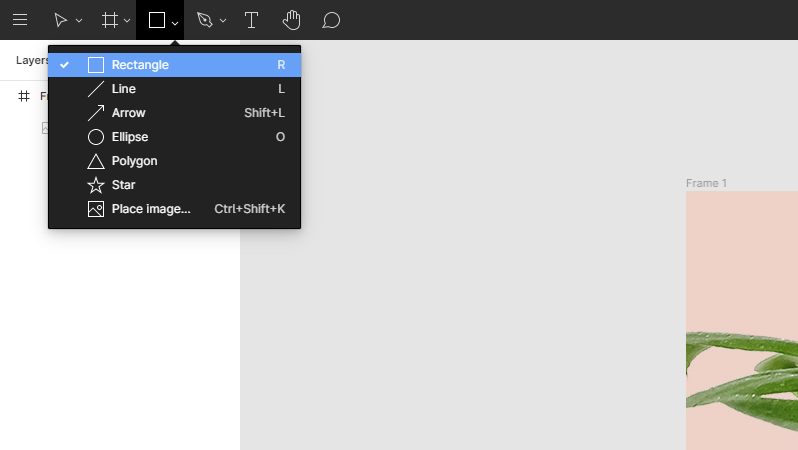
Step-by-step guide in the Figma
1. Set up the background
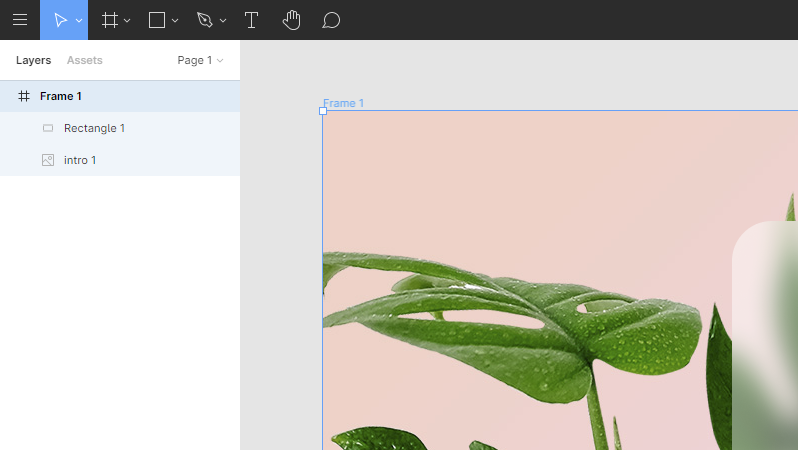
First, you’ll need to go to the Figma, log in and create a new file.
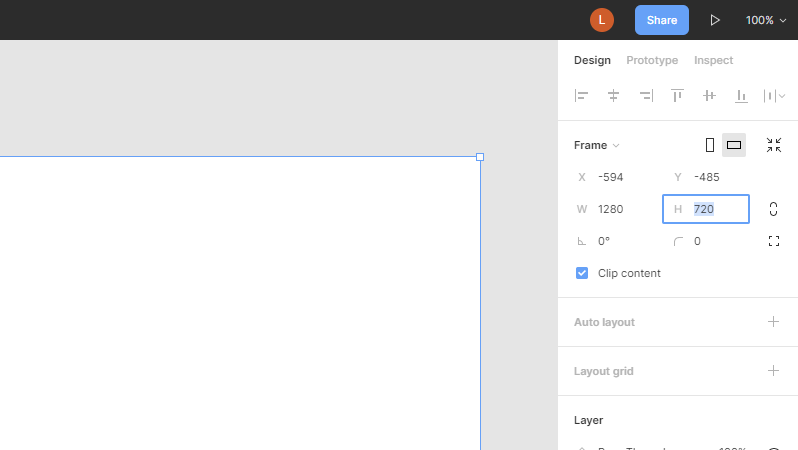
Then, draw a Frame (you can use shortcut F).
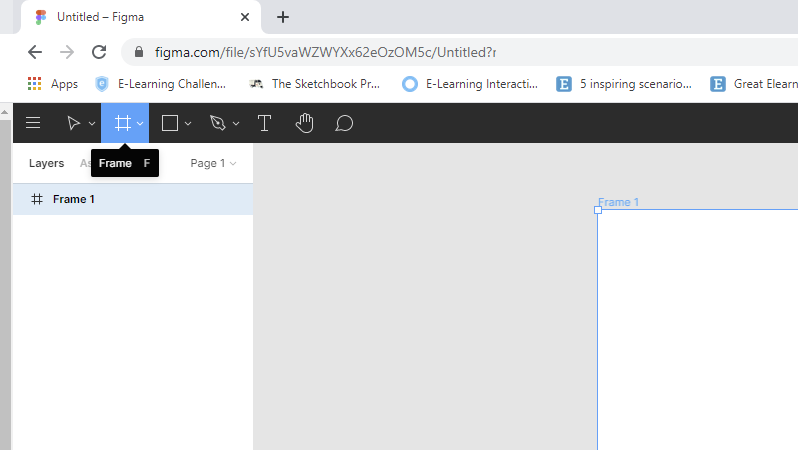
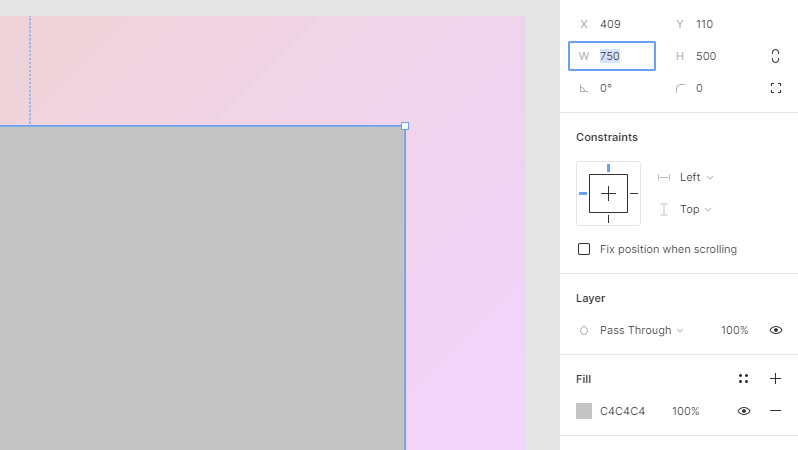
Select the desired size. In our case it is 1280px x 720px.
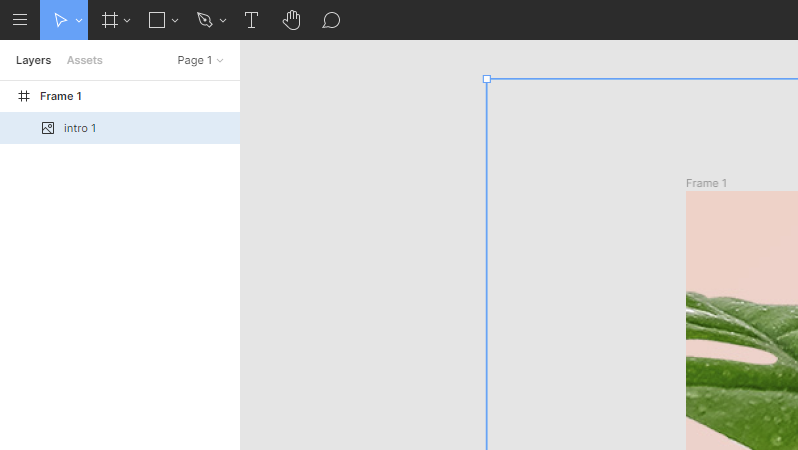
Choose the desired picture for background and drag it into the frame. It’s great if the picture is in the same size as the frame, but that’s ok if it’s bigger. Make sure it’s placed within the frame, not above the frame.
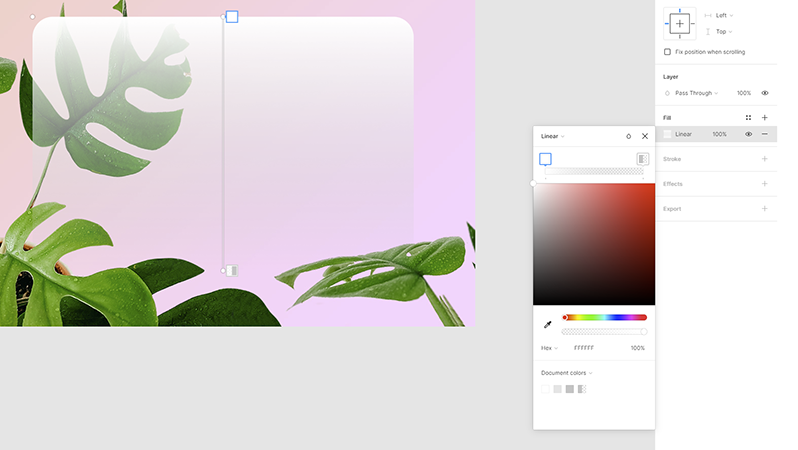
2. Add the shape for the effect
Make a rectangle (R) of the desired size. Enter exact dimensions on the right side of the window.
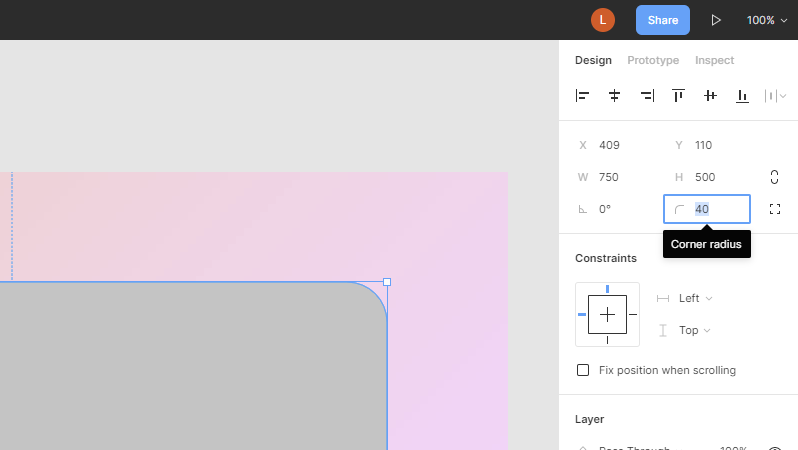
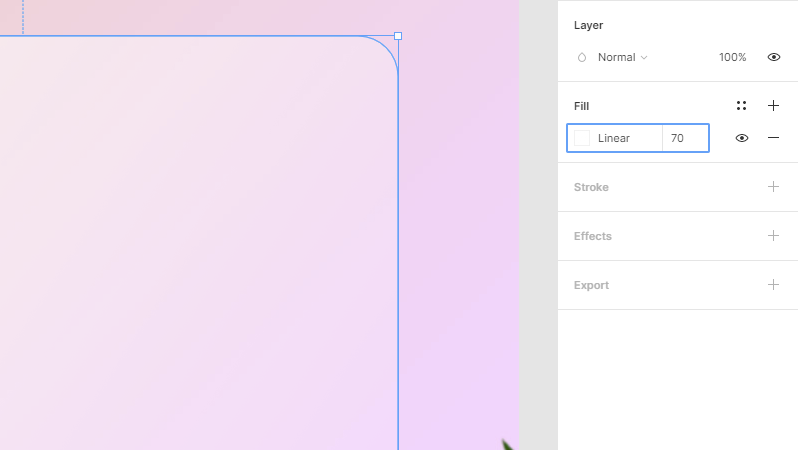
3. Format the shape
Round the corners (we entered 40).
Choose Linear gradient for fill.
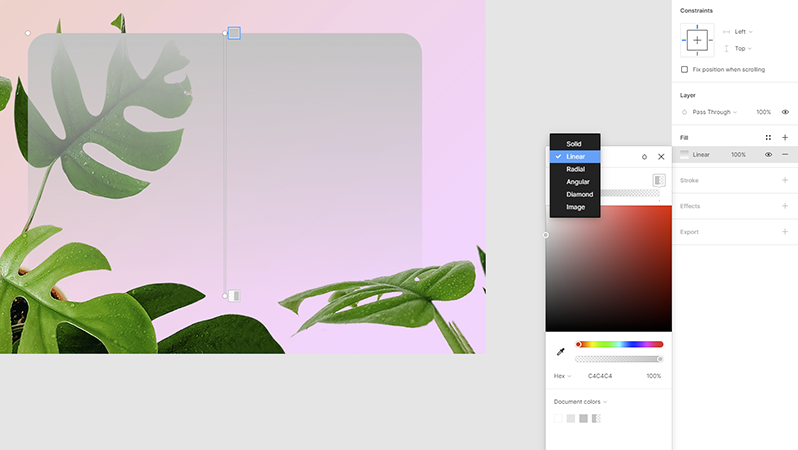
Enter colors for your gradient. On one side it will be 70% transparent FFFFFF, and on the other – 10% FFFFFF.
Drag upper anchor point of the gradient to the left corner, and the lower anchor point to the right corner.
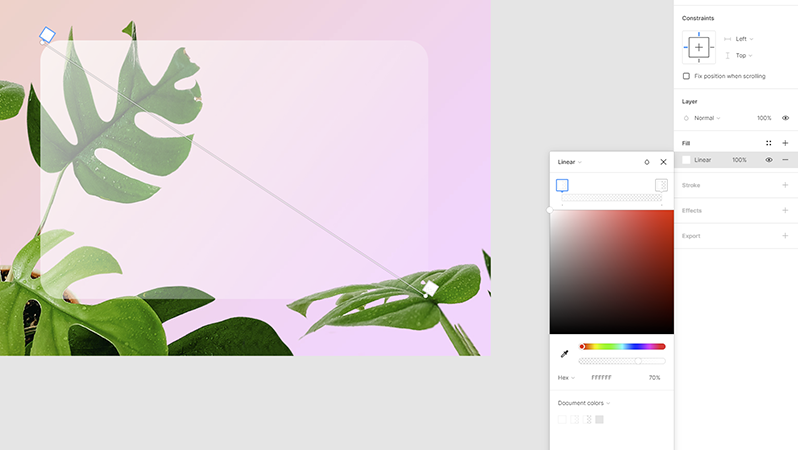
Change the Fill transparency to 70%.
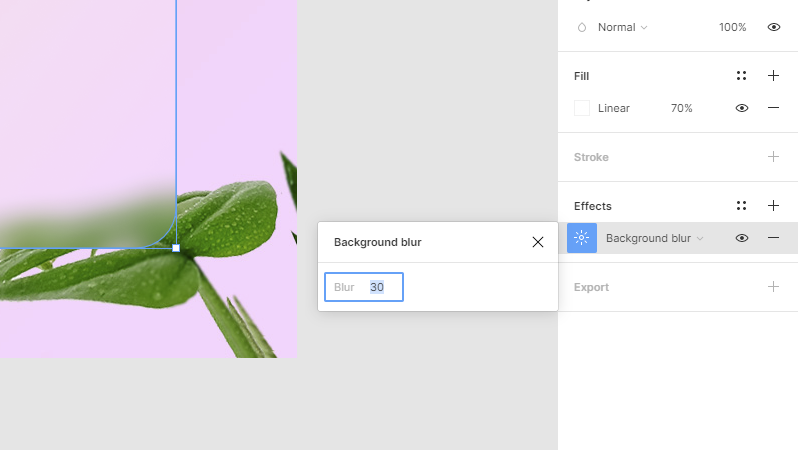
4. Add the background blur
Add background blur to the rectangle from Effects panel.
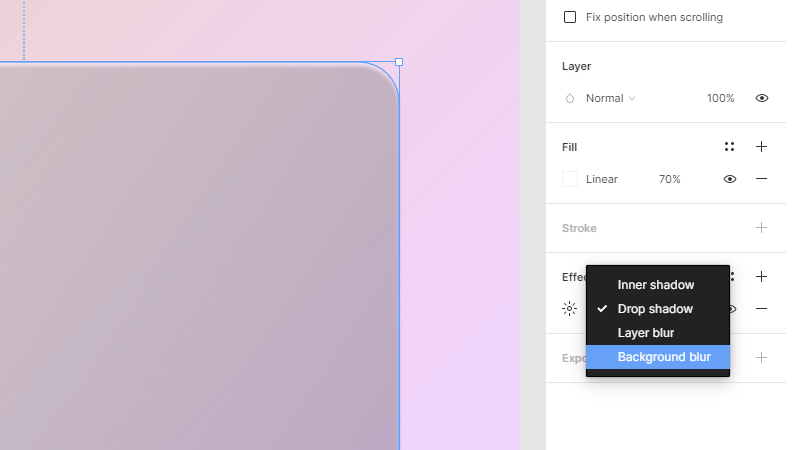
Change the blur amount to 30.
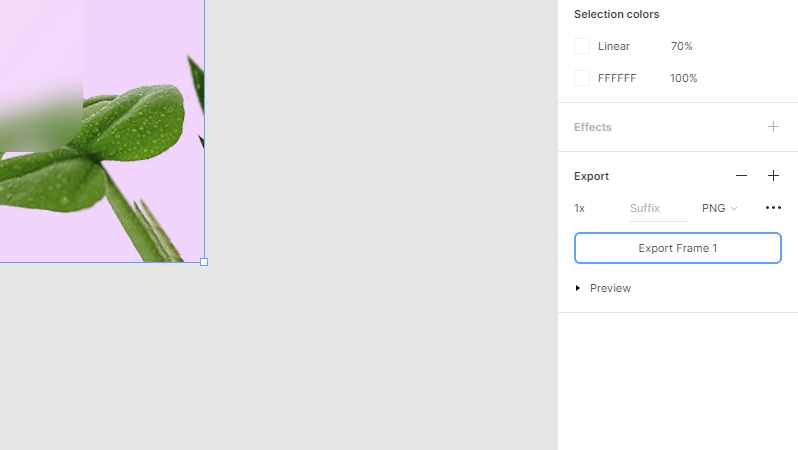
5. Export the image
Select the frame.
Head to export. Enter desired values if needed and choose the file type and click Export Frame 1. It will be downloaded to your computer.
And there you have it!

We hope you enjoyed this and it will inspire you to some awesome glassmorphism-themed artwork as well!
Very cool, thank you. How to change border color?
Thank you! You can add the border by clicking on the plus sign next to the “Stroke” on the right side menu. It is just below the “Fill” option. After you have done that, you can see the colour-preview box. Double click that and you can tweak the colour.