Here you will find useful information about changing color of the graphics we have used in our templates. We offer two scenarios – one where you have access to Adobe Illustrator (AI) but you have no clue how to use it and the second where you don’t have access to Adobe Illustrator so you have to look for other options.
How to edit SVG in Adobe Illustrator source file
How to open and edit SVG in Adobe Illustrator
How to edit SVG with Gravit Designer Free App
How to edit SVG with Figma
How to edit SVG with Inkscape
How to edit SVG with Powerpoint
How to edit SVG with Notepad
If you have Adobe Illustrator
Being our customer you have probably noticed that, besides the actual template, we provide an AI file with all the corresponding vector graphics. We will show you how to change the color of an element in AI. But before that we suggest you watch few short tutorials about navigation and the simplest actions in AI. Some of the suggested tutorials – Adobe Illustrator CC for Beginners or Illustrator – Tutorial for Beginners in 10 MINUTES!
Changing color in Adobe Illustrator source file
1. Locate the AI gui file in your folder and double click on it.
2. A workspace with the appropriate content opens. Should look something like this:

3. Every graphic is placed on it’s own artboard. Every state of the buttons should be placed on it’s own artboard. There may be files where states are in different layers. In this case you will have to enable the appropriate layer when editing and exporting the graphic.

4. Locate the necessary graphic and select the area which requires the color change.
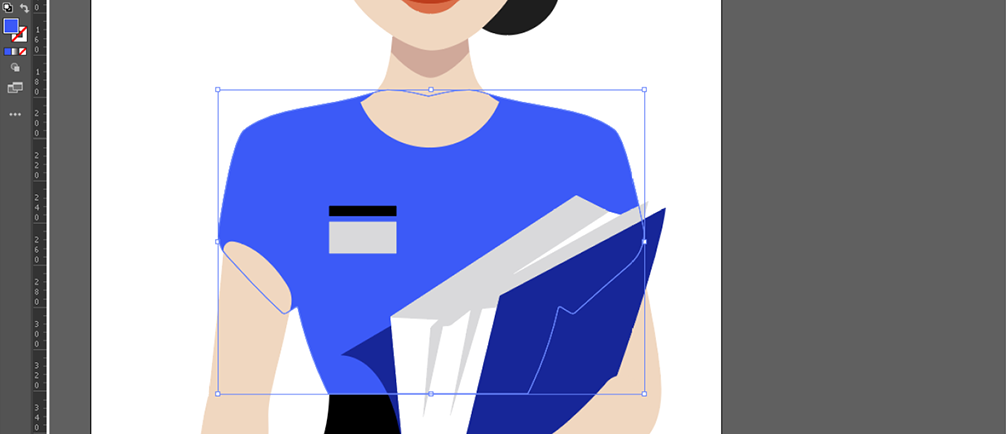
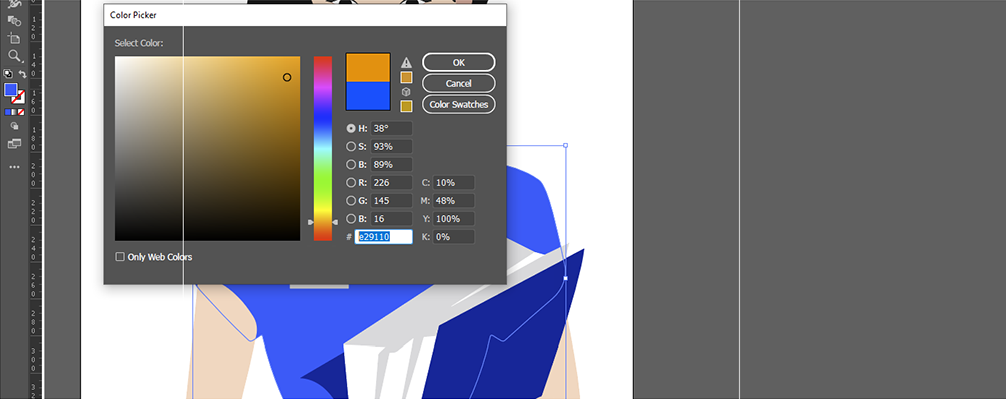
5. Double click on the Fill color box on the left hand side. A Color Picker window opens. Use the color picker or enter the desired color’s code. Press OK.
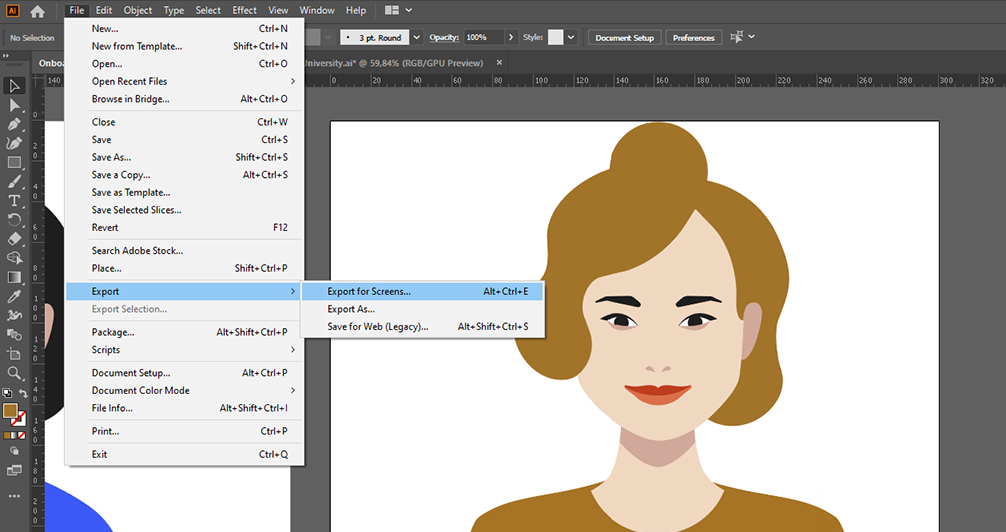
6. When you are done changing colors go to File (upper left corner) – Export – Export for screens.
7. In the Export for screens window choose the necessary artboards, location, file formats and settings you need and press Export Artboard.
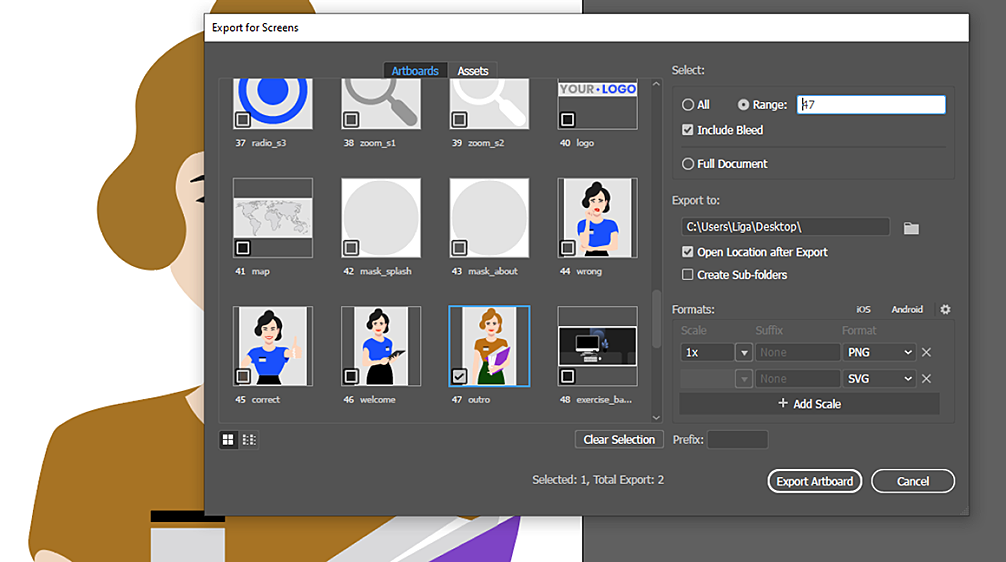
For more information about exporting settings watch Adobe Illustrator for Beginners Guide: Saving and Exporting. If you need to change color to multiple objects, you can do it in a matter of seconds. For more info click here.
Changing color of a SVG object in Adobe Illustrator
1. Locate the SVG file that requires color change and open it with Adobe Illustrator (right click – Open with – Adobe Illustrator).
2. Double click on the Fill color box on the left hand side. A Color Picker window opens. Use the color picker or enter the desired color’s code. Press OK.
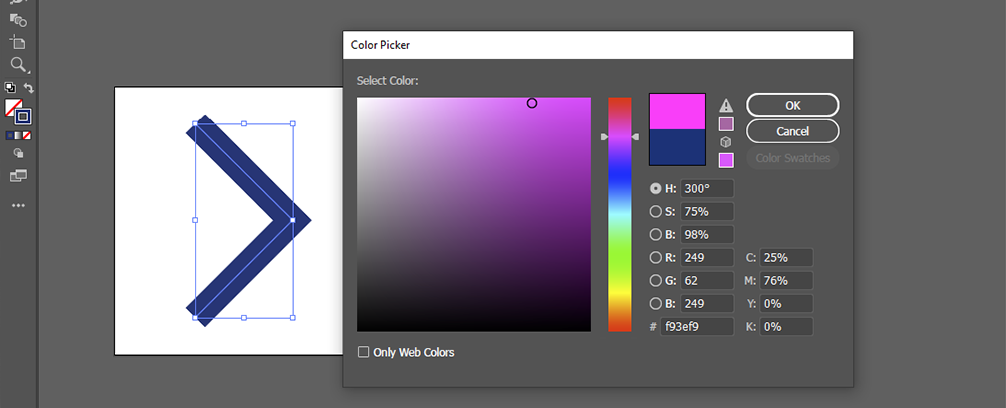
2. When you are done changing colors, close the file to save the changes.
If you don’t have Adobe Illustrator
Below we have put together some options for editing SVG files using Notepad or free apps. This is helpful if you are not used to working in Adobe Illustrator or you simply don’t have access to it.
1. Web based app Gravit designer
1. Go to designer.io/en/. Click on Get started (it’s possible you will have to wait a bit).
2. Create an account (don’t worry, it’s free and quick).
3. The app opens. Go to File (upper left corner), click on Open local file, choose the SVG you want to edit.
4. The SVG file is opened. Click on the detail that requires the color change.

5. On the right-hand side of the app window choose a color or enter the desired color code.
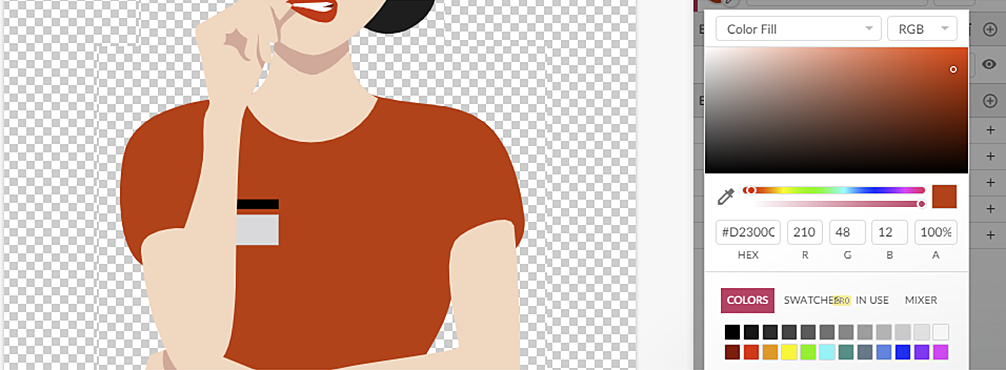
6. Go to File – Export and choose one of the options (SVG, PNG, PDF or JPEG).
7. Your edited SVG has been downloaded.
2. Figma
1. Go to figma.com.
2. Click on Try Figma for free and sing up.
3. The app opens. Go to the upper right corner and click on the Plus icon (New file).
4. Find the SVG you want to edit and drag it to the app.
5. Click on the detail that requires the color change. On the right-hand side of the app you will find Fill.

6. Enter the desired color code or use the Color finder. You can change solid color to different types of gradient too.

7. When you are done, go to the upper left corner and click on the frame (named wrong 1 for now).
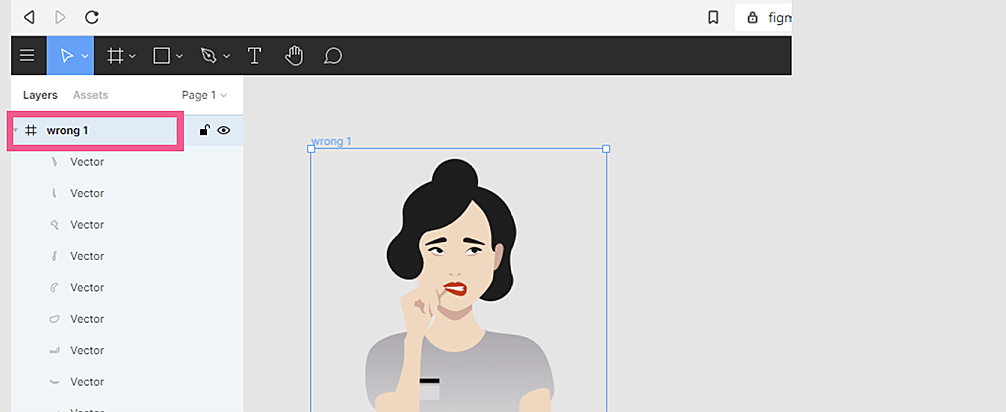
8. Go to Export.
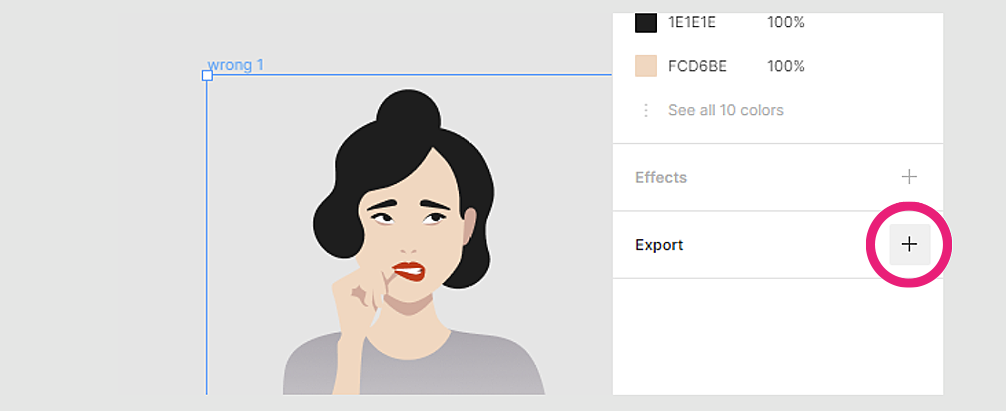
9. Choose the desired file format and scale (if necessary).

10. Under the Export window is a Preview window. Click it to see what your export will look like. Click on Export “file name” and save it in the desired location.
3. Inkscape
1. Open the app.
2. At the upper left corner click on File – Open and select the necessary SVG.
3. Select the detail which needs the color change.
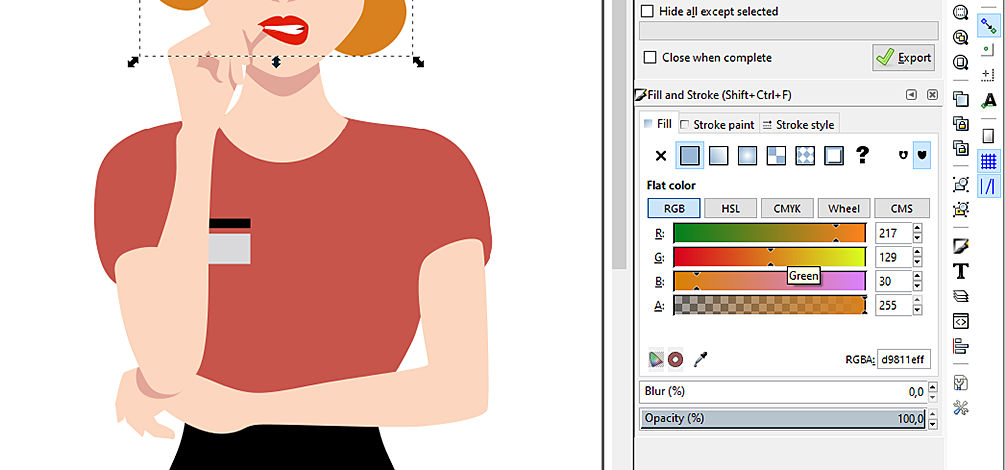
4. On the right-hand side choose from different types of fill and color modes. Make the changes.
5. Go back to File – Save to update the SVG or Save As to choose a different file format or destination.
4. Powerpoint
If you have Microsoft Office 365 then you can use PowerPoint to edit SVG graphics. This will be an easy way how you can edit SVG graphics without downloading or using any new programs.
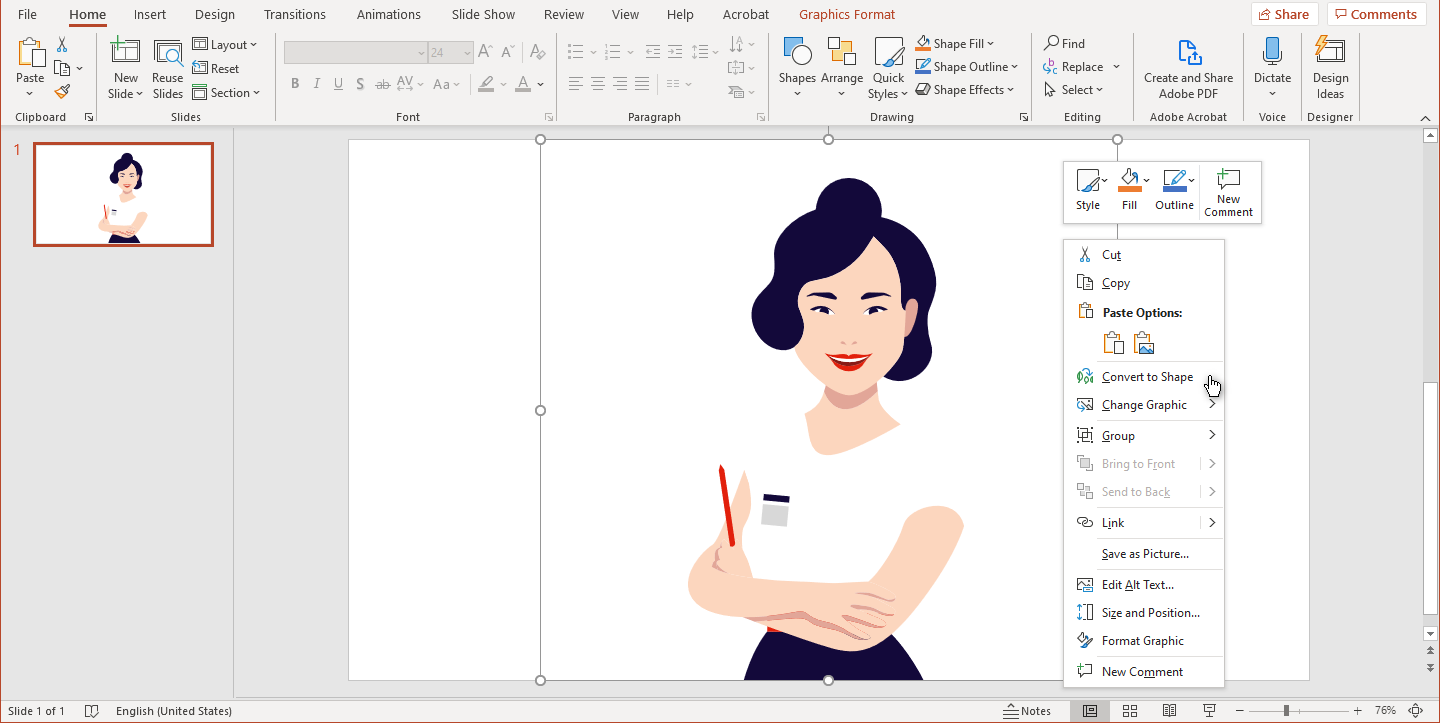
1. Open up PowerPoint and import an SVG image.
2. With the right mouse click select Convert to Shape.
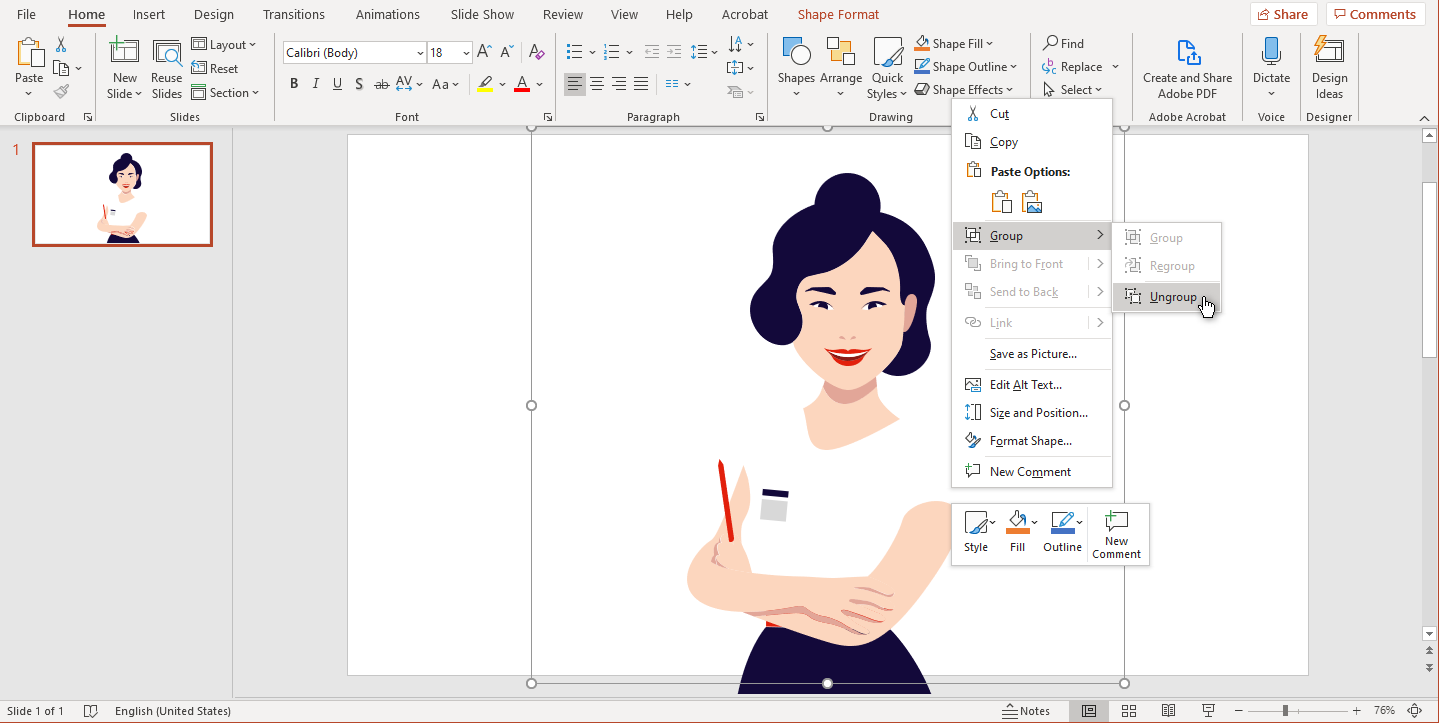
3. Then with the right mouse click select Group / Ungroup.
4. Now each object in the SVG file is separated and you can edit each individual part.
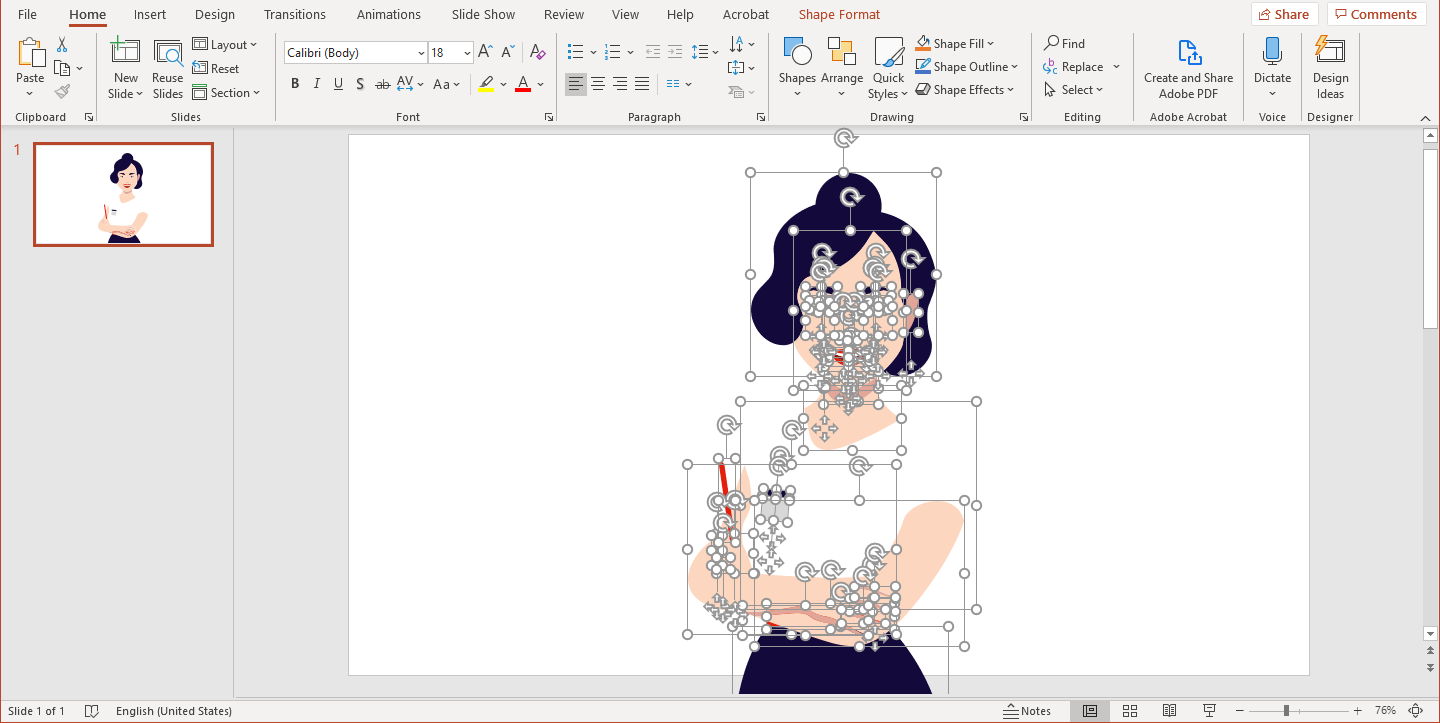
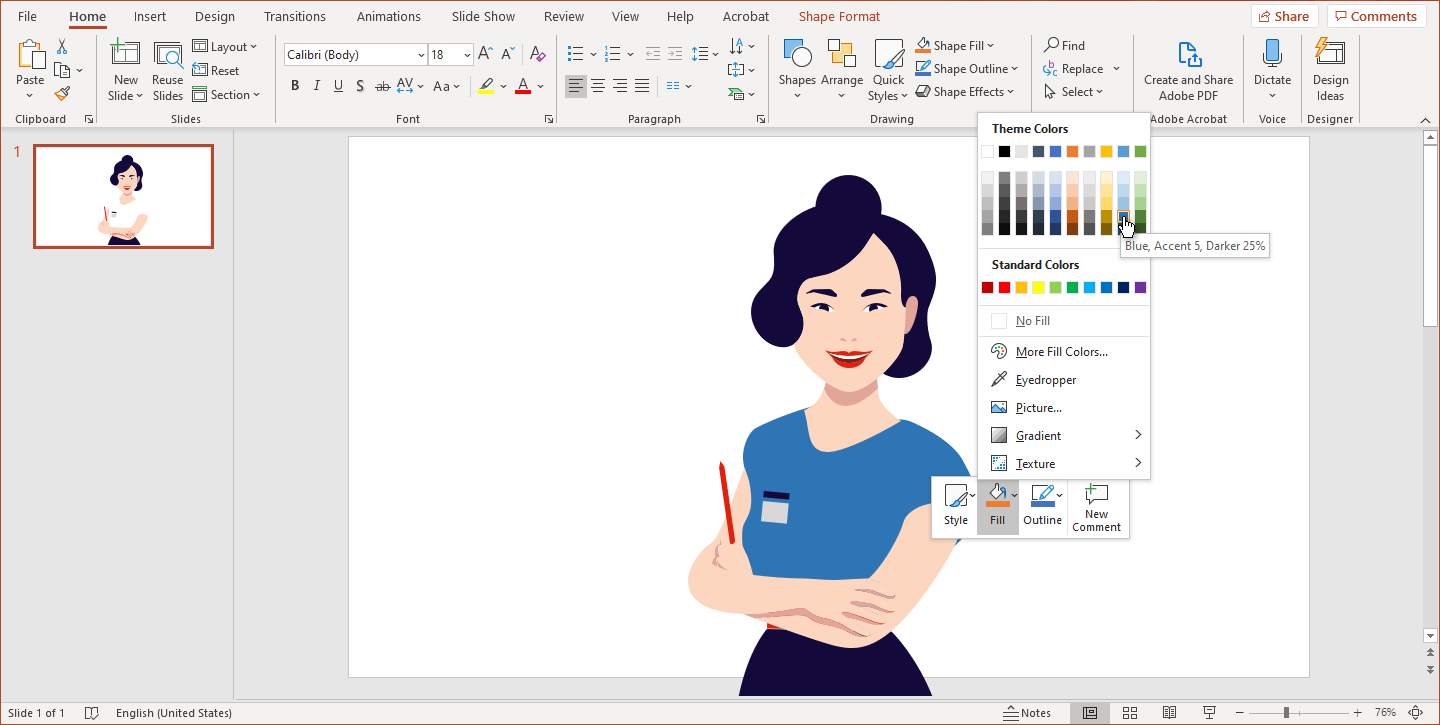
5. To recolor objects, you need to click on it and choose a color from Fill option like in the screenshot below. If you want to delete some parts of the image, just select it and click Cut from the right-mouse options.
6. Once you are done, you need to select all parts and regroup them back together.
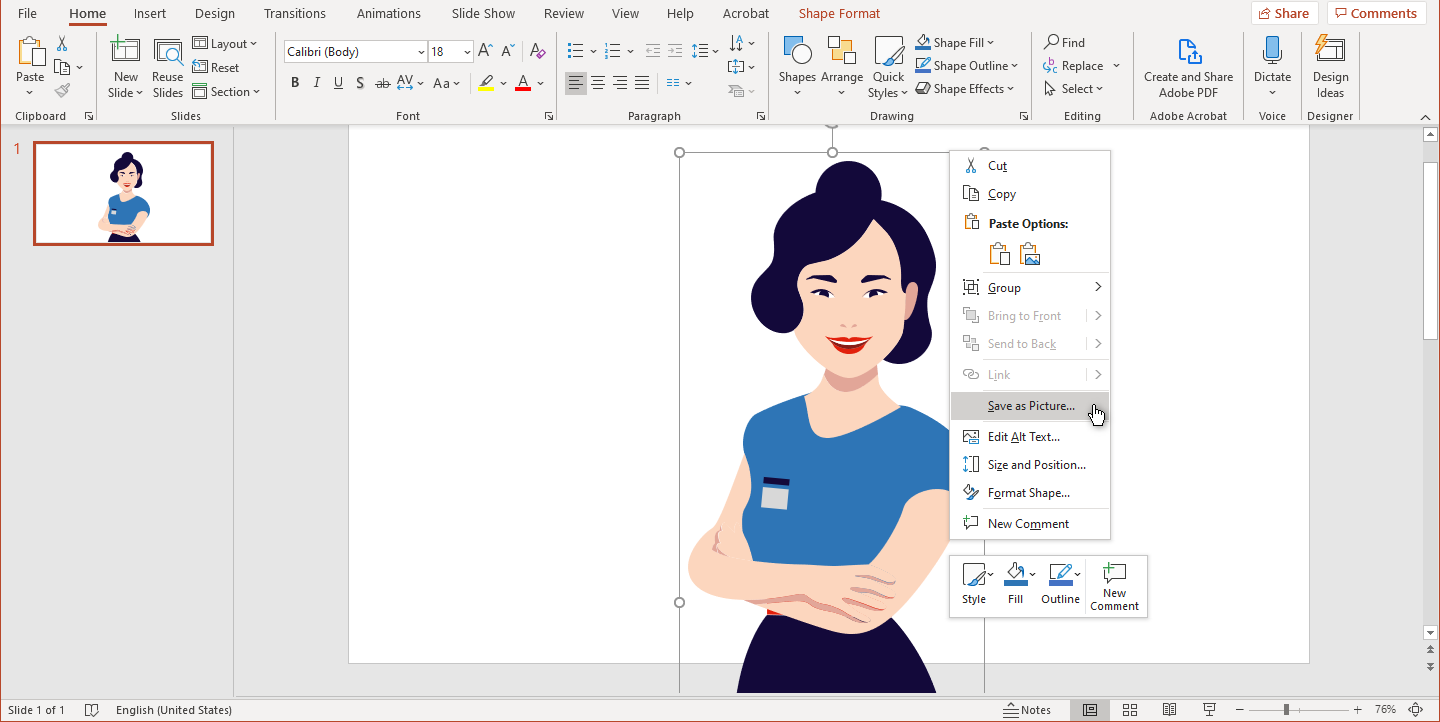
7. Then you can select Save as Picture… and choose the format you want to save. Powerpoint offers all usual formats like PNG, JPEG, SVG, etc.
5. Notepad
This is a very quick way to edit colors in a simple SVG. This method won’t work to save the file in a different format or to edit very complex SVGs (like the character above).
1. Choose the SVG, right click and select Open with Notepad. This time we will edit a radio button’s colors.

2. Something like this will open.

3. Let’s change the button’s stroke color from #1a50fc to #3a3a3a.

4. And the center’s color to #f91ccf.

5. Close and Save. This is what we have achieved.


You can also do this in PowerPoint.
Oh, I didn’t know that! I will add that too, thanks Mike!