Apart from creating our own digital products, we also have the pleasure of working on various custom development e-learning projects for our clients. We really enjoy this work because the ideas and needs of our clients are vastly different, and we often find ourselves challenged and inspired by the process.
This time I wanted to dive into a specific need that some of our clients have had in the last couple of years – converting old Flash courses into HTML format. So, I thought it would be worth taking a peek into how this can be done.
The easy way
The first (and much simpler) approach you can take is to export the Flash course as a video in .MP4 format and then insert it into your authoring tool (for us, this was usually Lectora) and publish in HTML. Sounds quite easy, right? That’s because it is – it only took us a few steps to get this done:
1. Adjust the size of the video in Flash CS6. Whether this is necessary or not will depend on the dimensions you want for your new project.
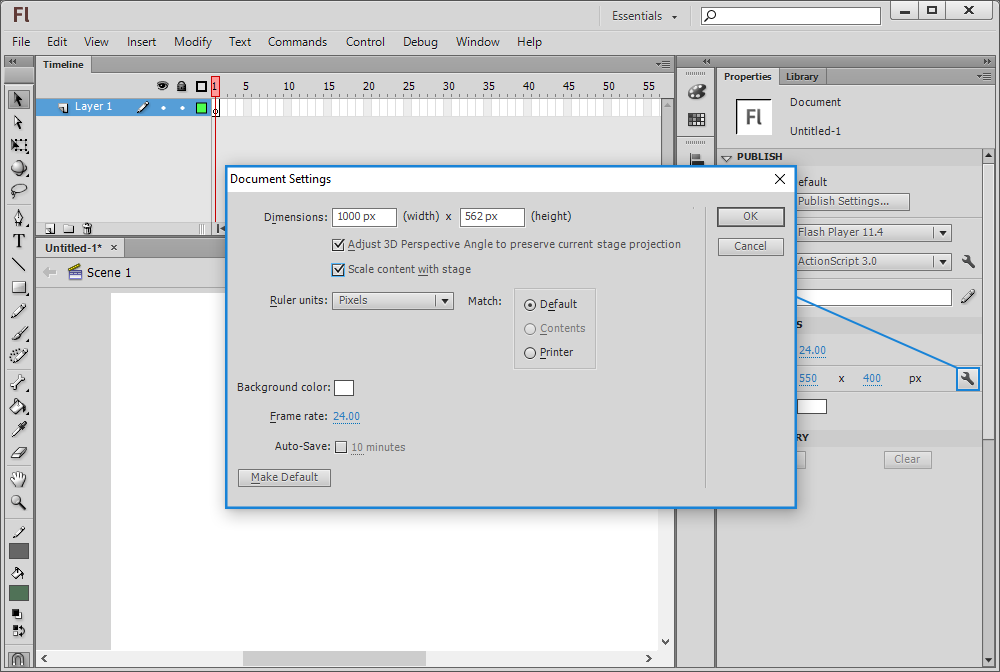
2. Export from Flash in QuickTime (.MOV) format – this will produce a video that’s in reasonably good quality.
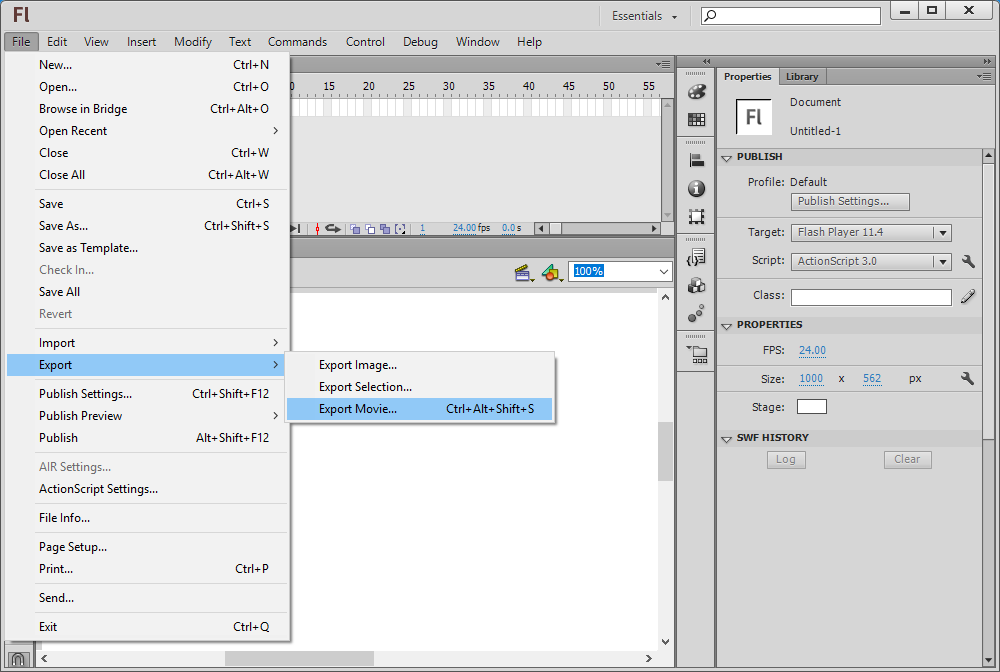
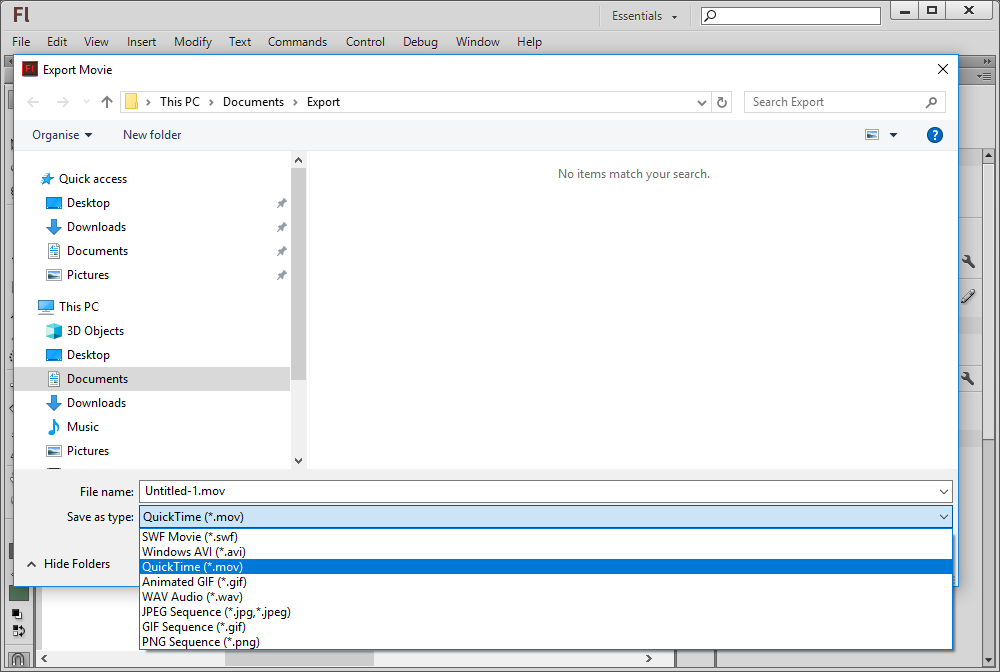
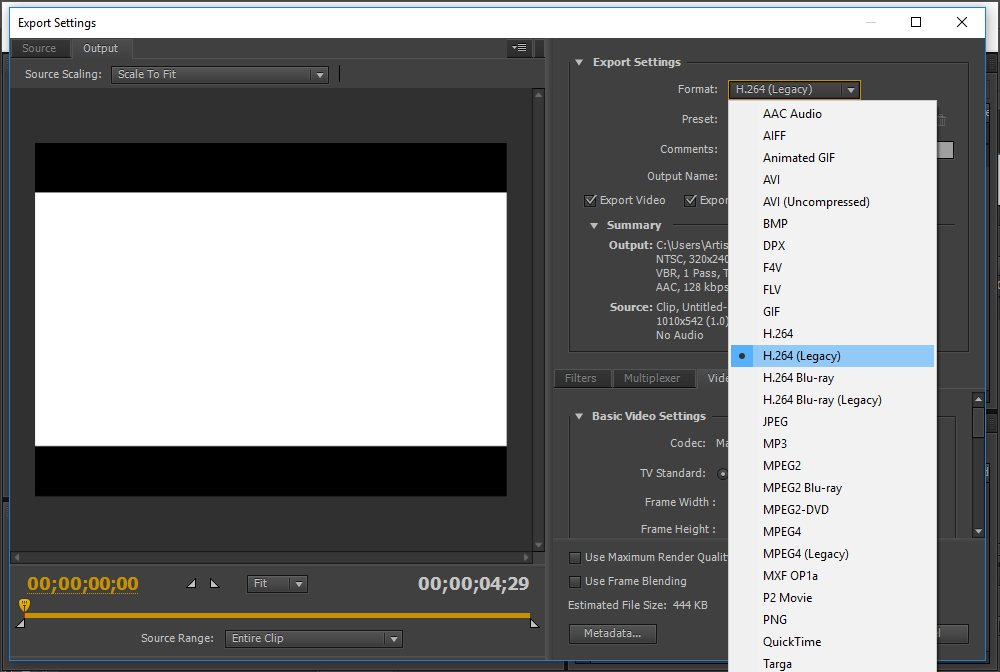
3. Use Media encoder with H.264 video compression standard to convert your video. To do this:
Go to ‘Export Settings’ and select the right format.
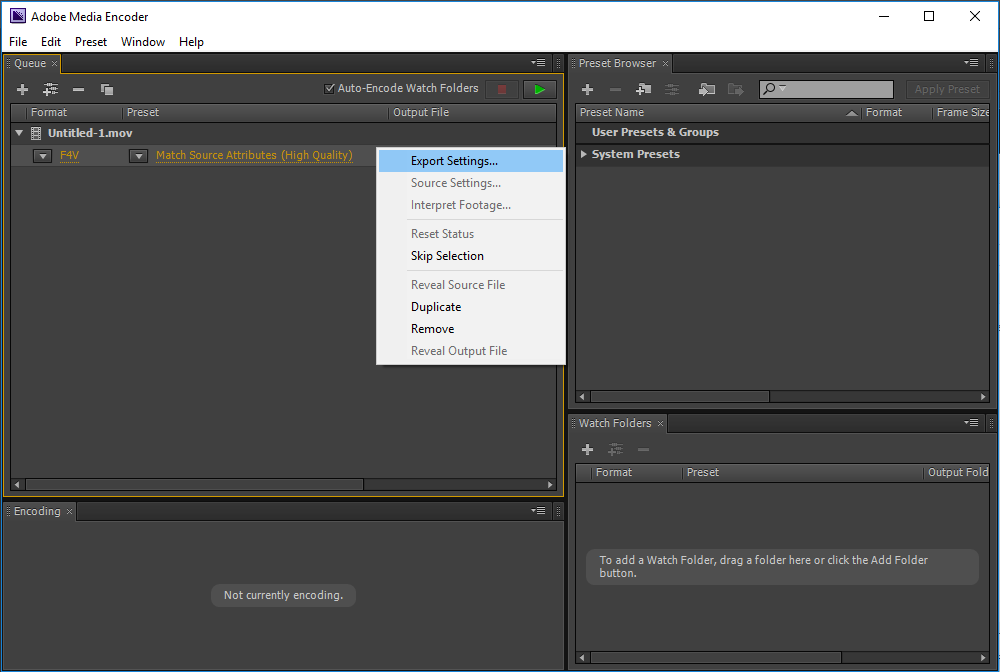
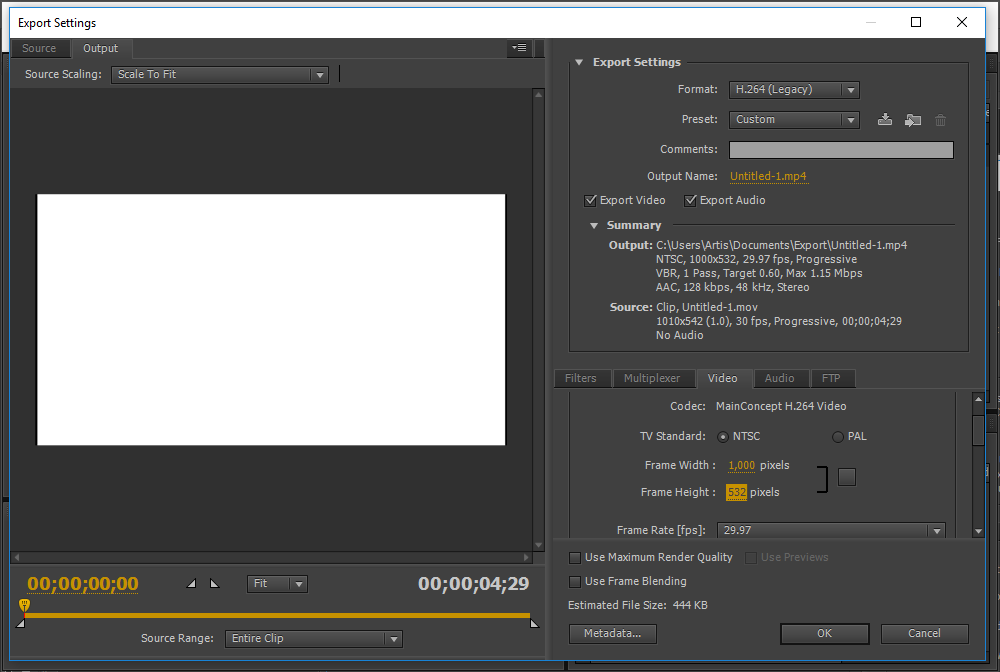
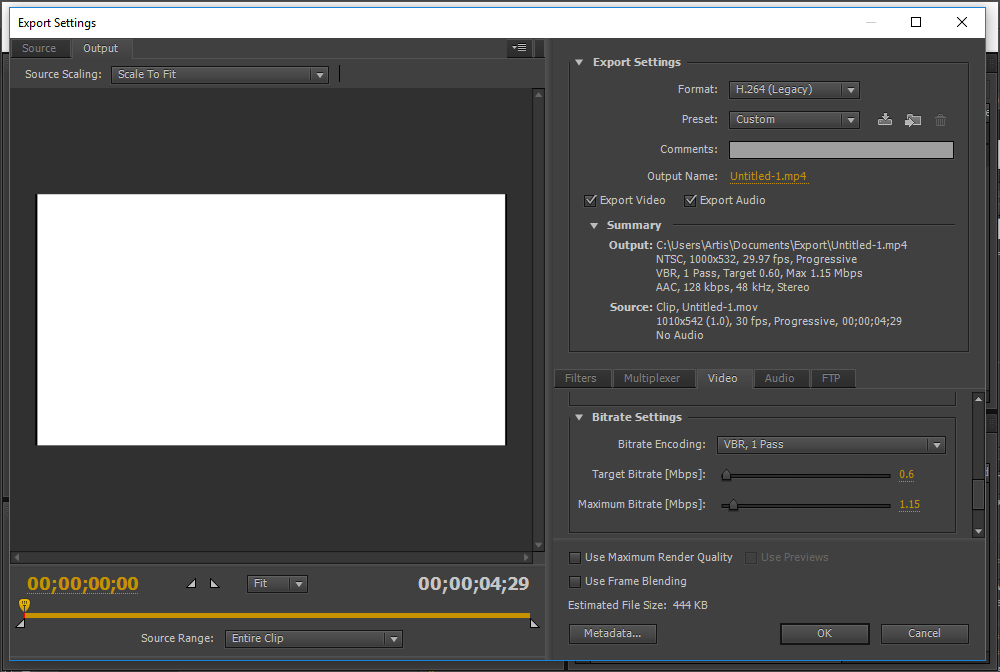
If necessary, you can adjust the video size and bitrate.
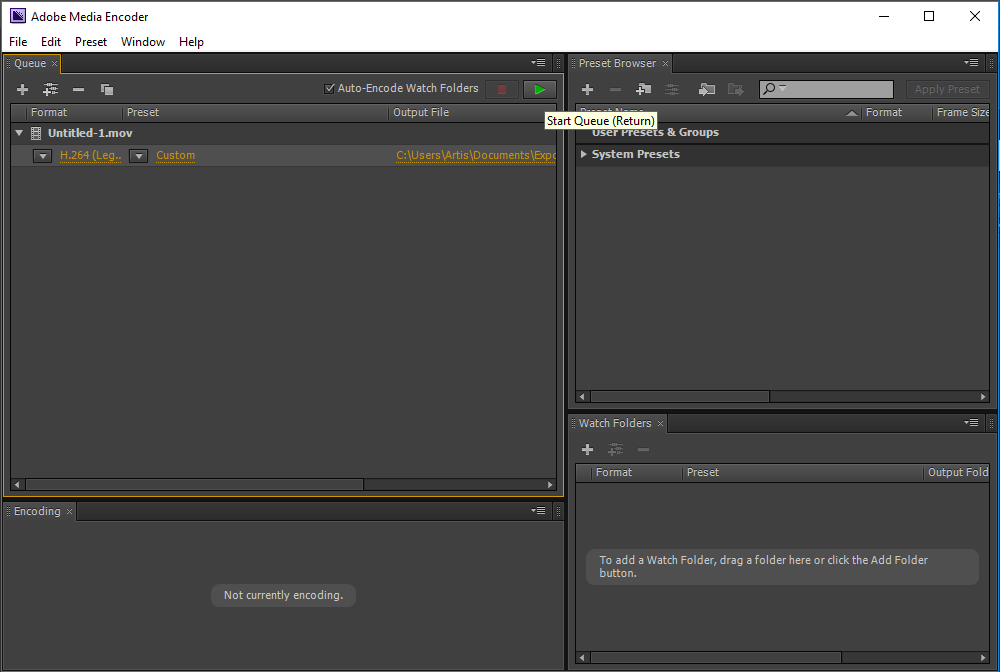
You will get an .MP4 file that you can insert in your new course.
The benefits of this approach are that it’s not difficult to do and the end result will look almost exactly the same as the original.
However, there are also significant drawbacks. First of all, this approach will only work for simple animations and slideshows. As soon as you have interactive elements on the screen, you won’t be able to transfer them from Flash into your authoring tool and this means a lot more work for you (as you’ll learn in just a bit). Secondly, if you want to make any changes in the course content, you will need to do it in Flash and then export the file anew.
The hard way
So, as mentioned previously, exporting a Flash course in video format won’t be useful if you’re dealing with interactive content. This means that you will need to recreate these interactions in your authoring tool.
Essentially, you use the Flash course for reference and build the pages from scratch. If you have access to the Flash source files, you can extract the elements from there. Here’s a brief step-by-step guide on how it’s done:
1. Select the frame with the elements that you need
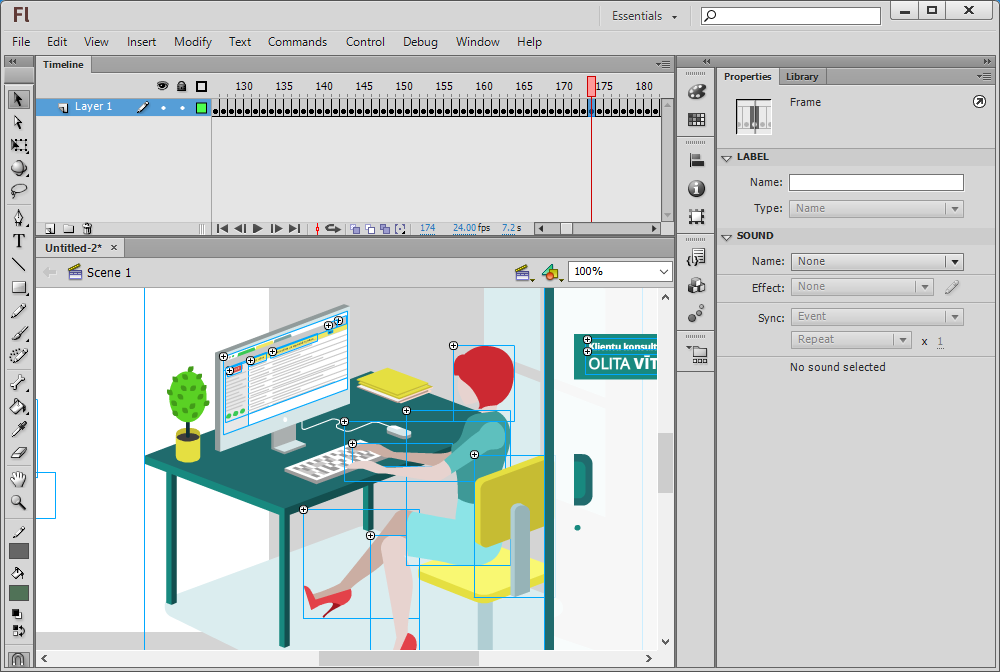
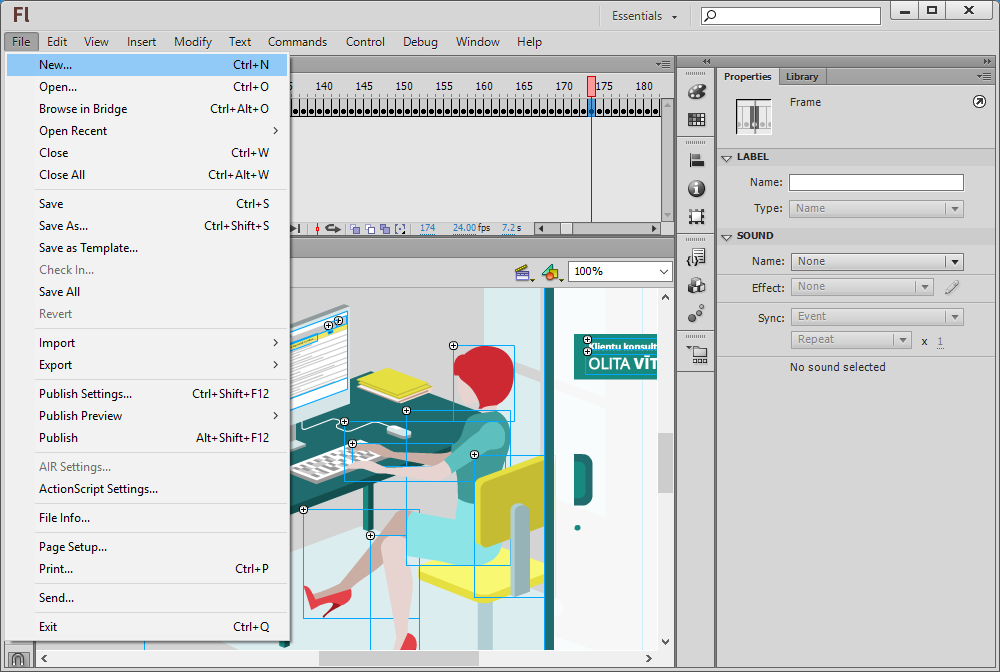
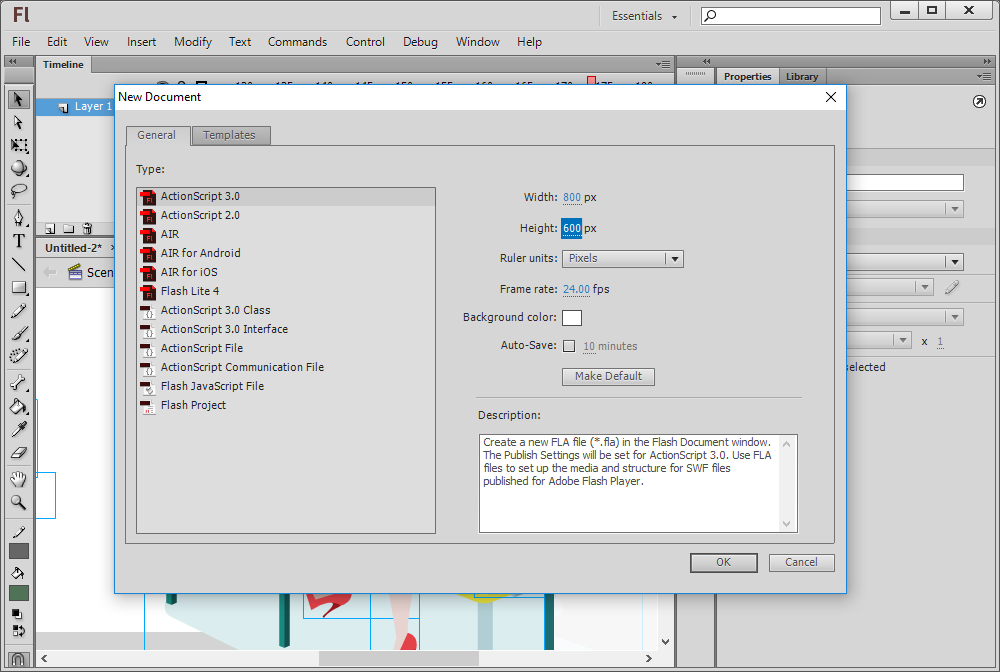
2. Open the menu and create a new file in the correct size
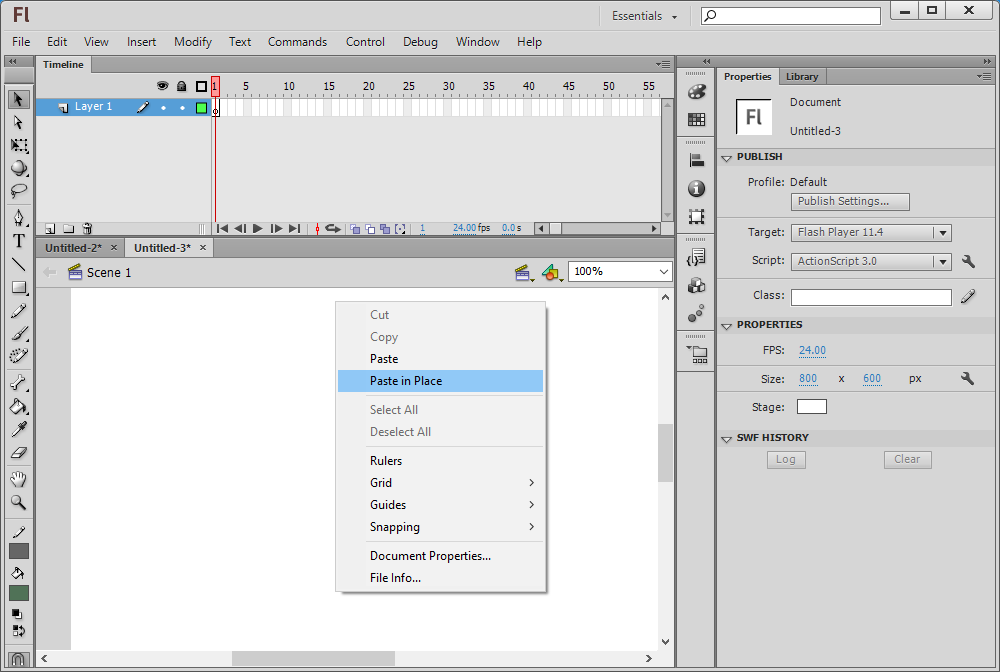
3. Select the ‘Paste in Place’ option to paste the objects in the same coordinates as in the original
4. Open the menu and select the ‘Export Image’ option
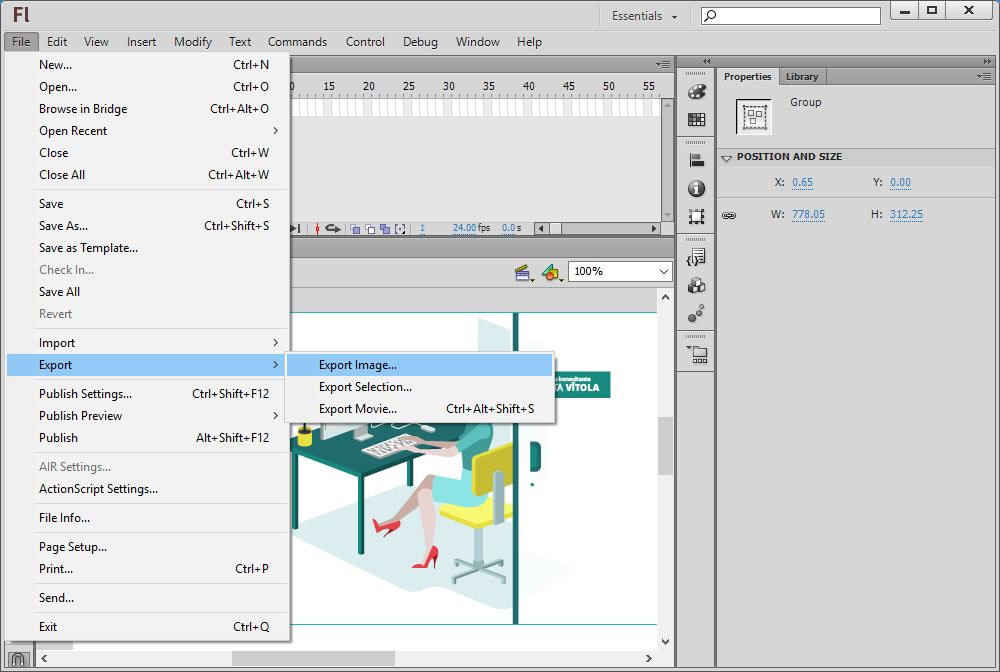
5. Select the necessary file type and save the file
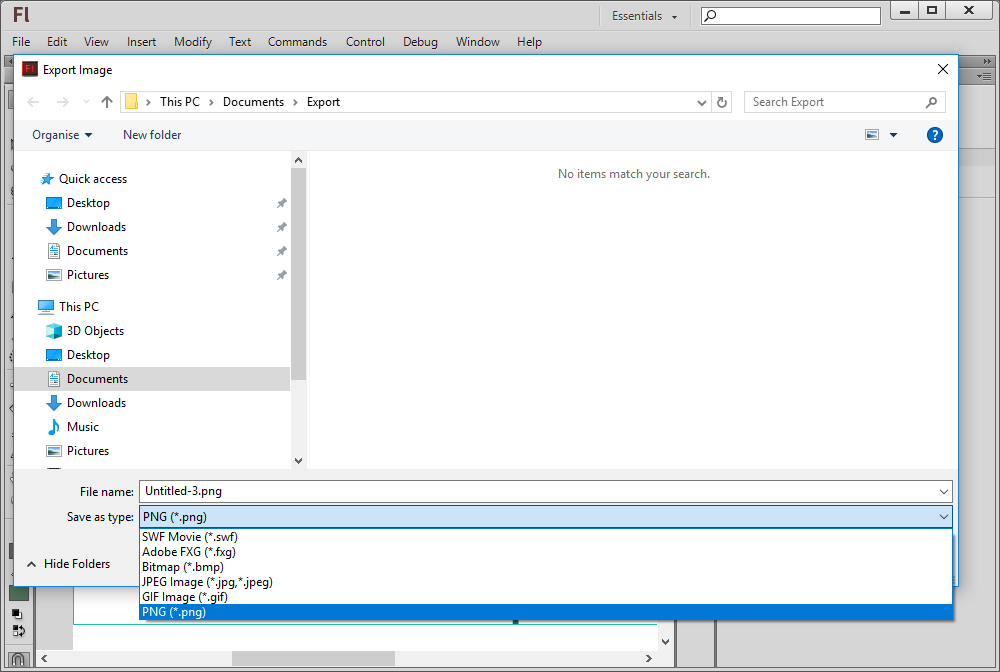
Once you’ve exported the elements, you can insert them into your authoring tool and add the necessary actions to make them functional. It’s worth noting that previous knowledge of Flash can definitely come in handy at this point, as you will have less trouble finding what you need if you have an idea of how it’s built.
So, if you go about it this way, you should think of it as a custom development project. You should also take into account that the options offered by Flash and any other authoring tool differ – there are very few limits in Flash, so it’s possible that you will come across certain things that you simply can’t achieve in your authoring tool.
However, if you do decide to put in the effort and build the course in your authoring tool, it may be wise to use this as an opportunity to make changes and update the course to make it more relevant and modern. This way, you will gain more from the time you will inevitably invest into the project. When thinking about current tendencies in e-learning, it’s also worth noting that the most popular authoring tools (such as Adobe Captivate, Articulate Storyline, Trivantis Lectora) no longer use Flash and the output from these tools will be in HTML5 format.
I don’t have source files
The methods described above will only work if you have the Flash source files. If you don’t, then unfortunately everything gets even more tricky. You can still attempt to obtain a video by using screen capture software or some other tool that can convert published Flash files (.swf) to video format (for example, Sothink video converter). However, this means that there’s pretty much no way for you to make any changes in the course.
There’s also software that can help you extract images and videos from SFW files. One example would be the Sothink SFW Decompiler. However, it’s important to note that you can’t simply copy and paste text from an SWF file. This means that, yet again, you will have to use software that can recognize text in images to extract all text, frame by frame. This is quite time consuming, and you may consider simply writing the texts up yourself, especially if you plan to edit it them anyway.
The truth is that if you don’t have the source files, you may be better off creating a completely new course in your preferred authoring tool and using the Flash course only for reference without trying to extract anything from it.
So, what should I do?
There is no single answer to what you should do with your Flash courses. If they are simple and non-interactive, the video conversion solution can work really well and will enable you to move from Flash to HTML quite painlessly. If, however, the Flash course is more complex, you need to carefully evaluate whether the time and effort you’ll be putting in the project will pay off.
Explore all e-learning templates
Explore hundreds of course starters, games, click & reveal, info pages and test templates. Click the button below and see all of our e-learning templates!


Comments